2 Python in Docker in VS Code
2.1 Learning Objectives
A word about file types
So far we’ve see three important types of files. First, for data, we’ve focused on *.csv and *.txt files. These store flat, tabular data and are the most common formats for structured data.
Second for writing and running code, we saw plain stripts in R and we’ll see the same in Python:
| Plain script | Execute on the command line |
|---|---|
*.R |
Rscript *.R |
*.py |
python *.py |
Third, for reporting, we sar Rmarkdown files in R. In Python, Jupyter notebooks are the preferred choice.
| Notebook file | Format |
|---|---|
*.Rmd |
Human-readable plain-text markdown with R chunks |
*.ipynb |
Machine-readable JSON with markdown and Python chunks |
Variants of Jupyter notebooks are found in Google Colab and Kaggle Notebooks. They are quite flexible, since they are written in JSON but more difficult to manage because of that. Until recently, if you wanted to work on Jupyter notebooks, you’ needed to use an online editor or the Jupyter Notebooks app that came packaged with Anaconda. Luckily, VS Code offers notebook reading and editing capabilities. So we can do everthing inside one text editor. Give it a try by opening Misk_DSI_data > Learn_Py > lessons > 0 - hello world.ipynb and pressing the play button.
2.2 VS Code & Extensions
Python is available in a variety of different builds and it’s not uncommon to have several builds, versions and virtual environments on the same local computer.1 To simplify installation, we’ll use a Docker container for this class.
We’ll also use what has emerged as the most popular text editor for Python – Visual Studio Code (aka VS Code), from Microsoft.2 The integrated marketplace for extensions add unmatched flexibility and performance. This includes Docker, which is well integrated with VS Code. We’ll use this to our advantage and simplify our workflow.
Follow the instructions below to set up your computer:
2.2.1 1 - VS Code Text Editor
Download and install VS Code. You should see a welcome screen similar to the one below. Don’t panic if it’s not identical, we’ll install your extensions right away!

2.2.2 2 - VS Code Extensions
Install the Python and the Docker extensions (see below).
If you are on Windows, please also read this guide on running WSL. This is from the Getting Started with Python in VS Code:
Windows Subsystem for Linux: If you are working on Windows and want a Linux environment for working with Python, the Windows Subsystem for Linux (WSL) is an option for you. If you choose this option, you’ll also want to install the Remote - WSL extension. For more information about using WSL with VS Code, see VS Code Remote Development or try the Working in WSL tutorial, which will walk you through setting up WSL, installing Python, and creating a Hello World application running in WSL.
First, go to the Extension marketplace:
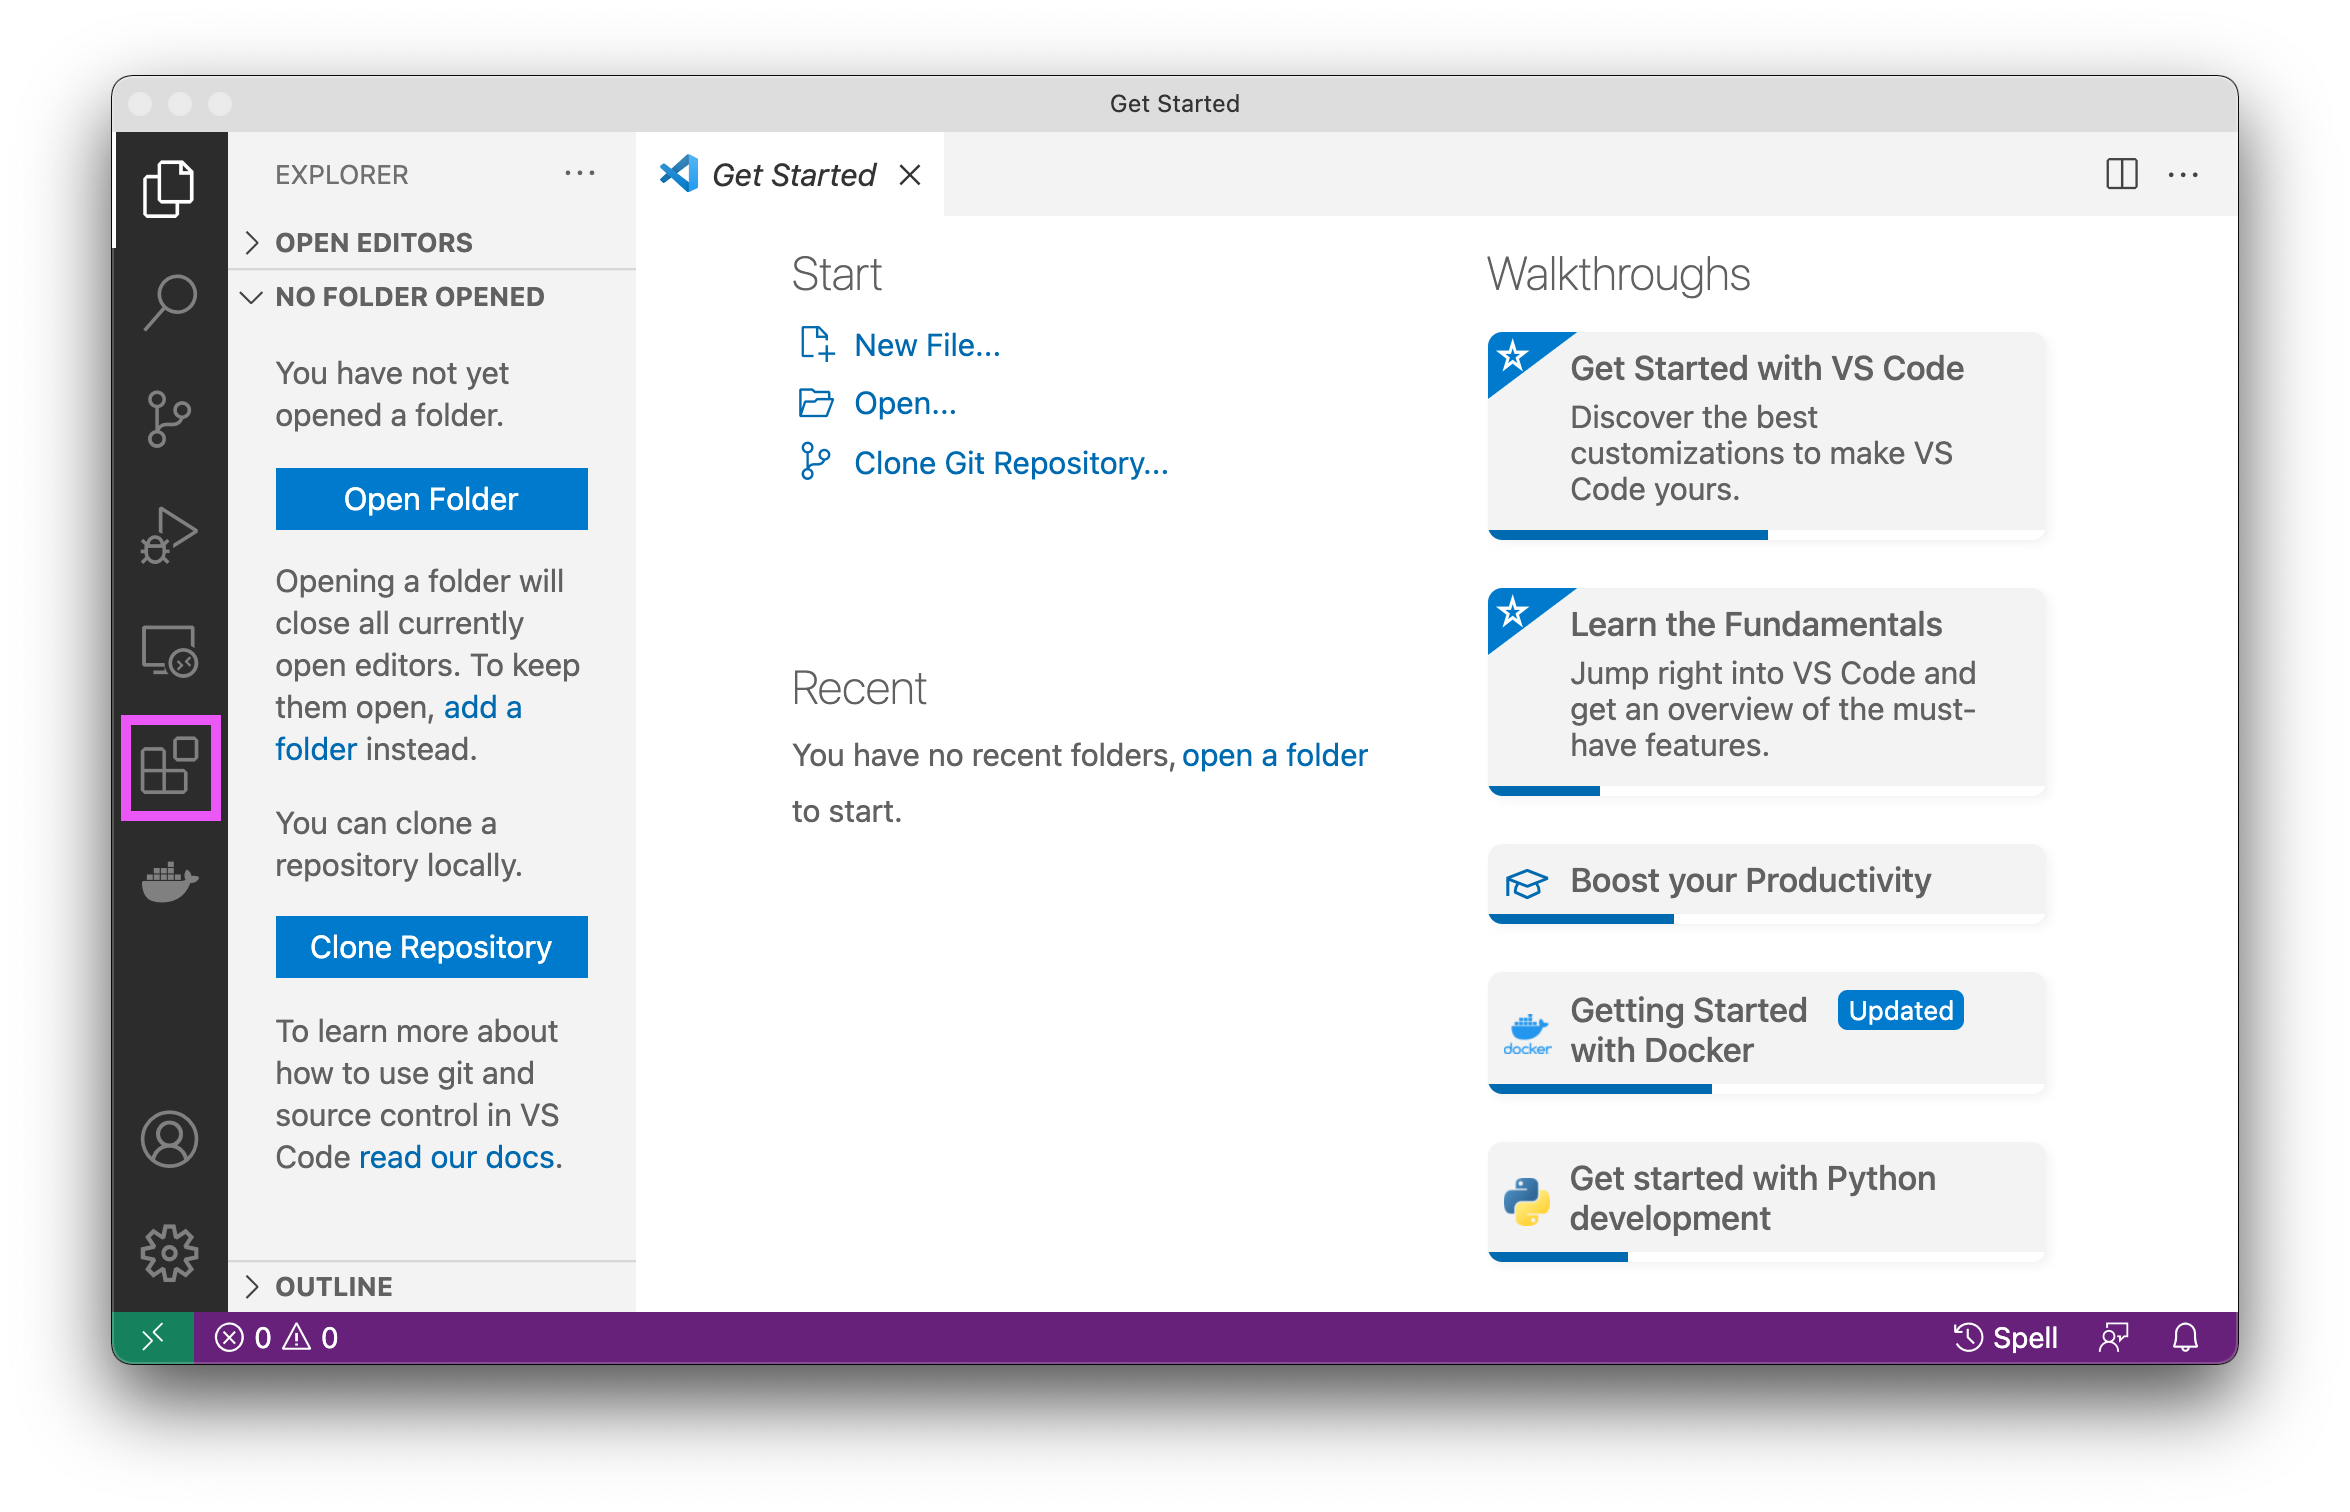
Figure 2.1: Selecting the Extension Marketplace
Search for and install the Python extension from Microsoft. You may be asked to install the Python Linter. If so select yes.
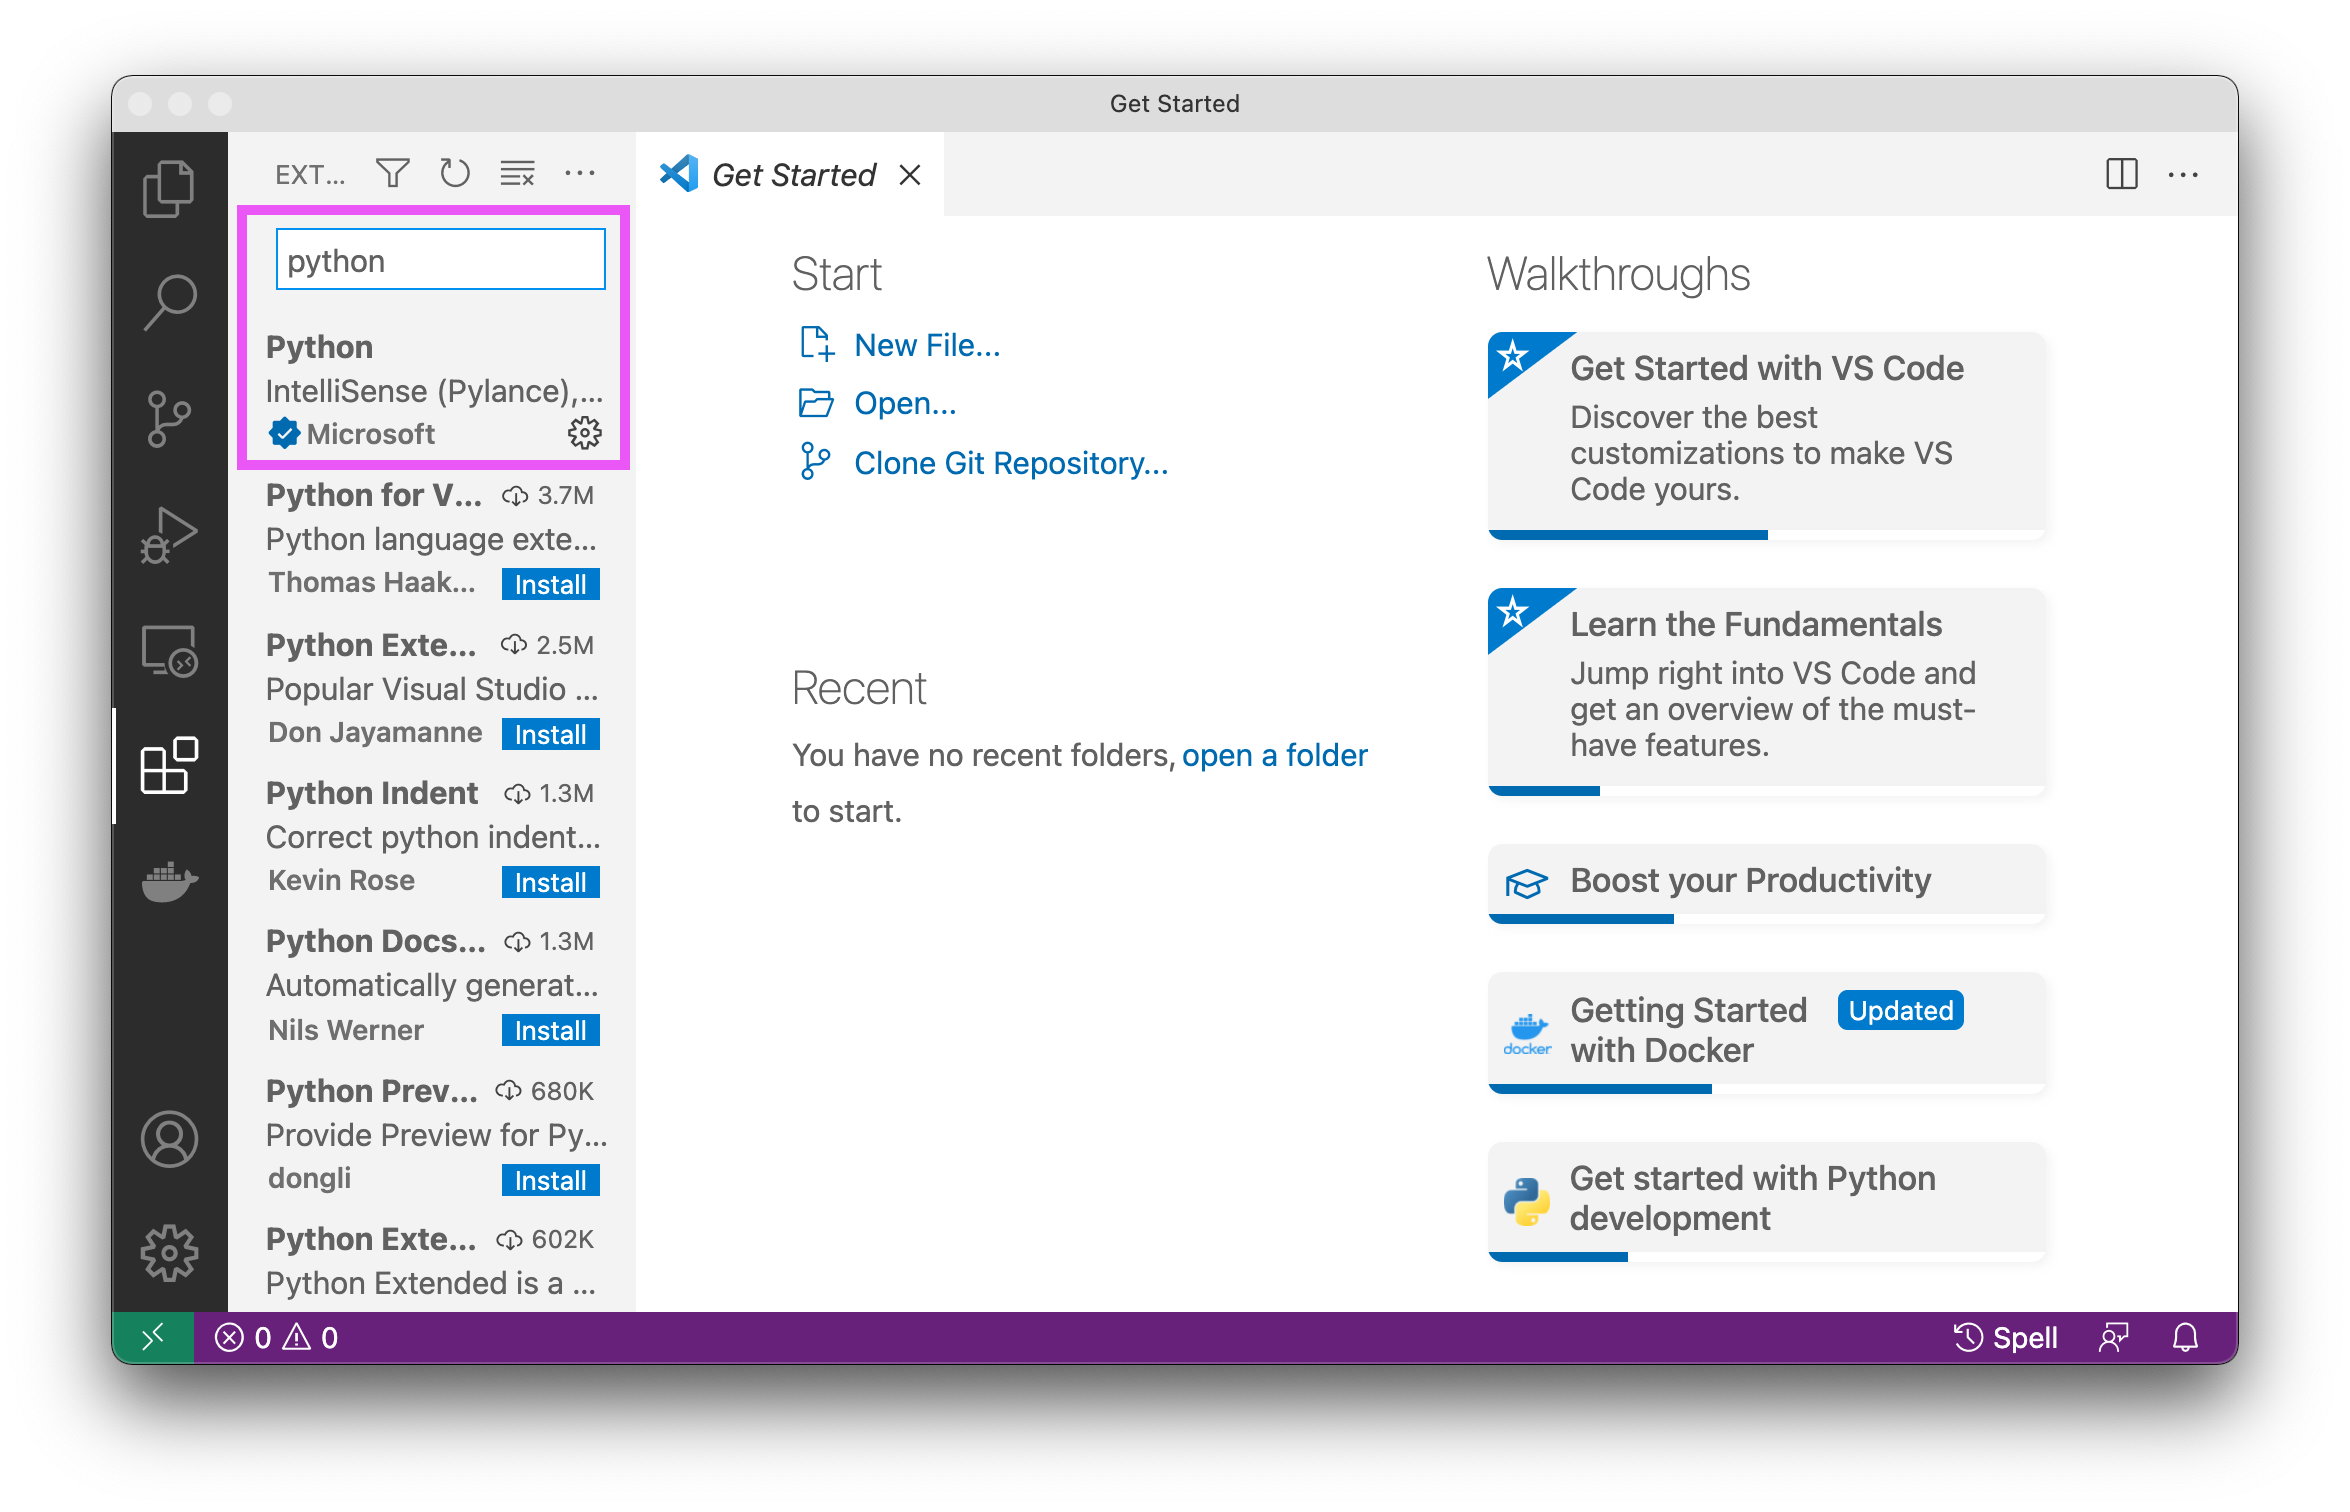
Figure 2.2: Install the Python Extension from Microsoft
Search for and install the Docker extension from Microsoft.
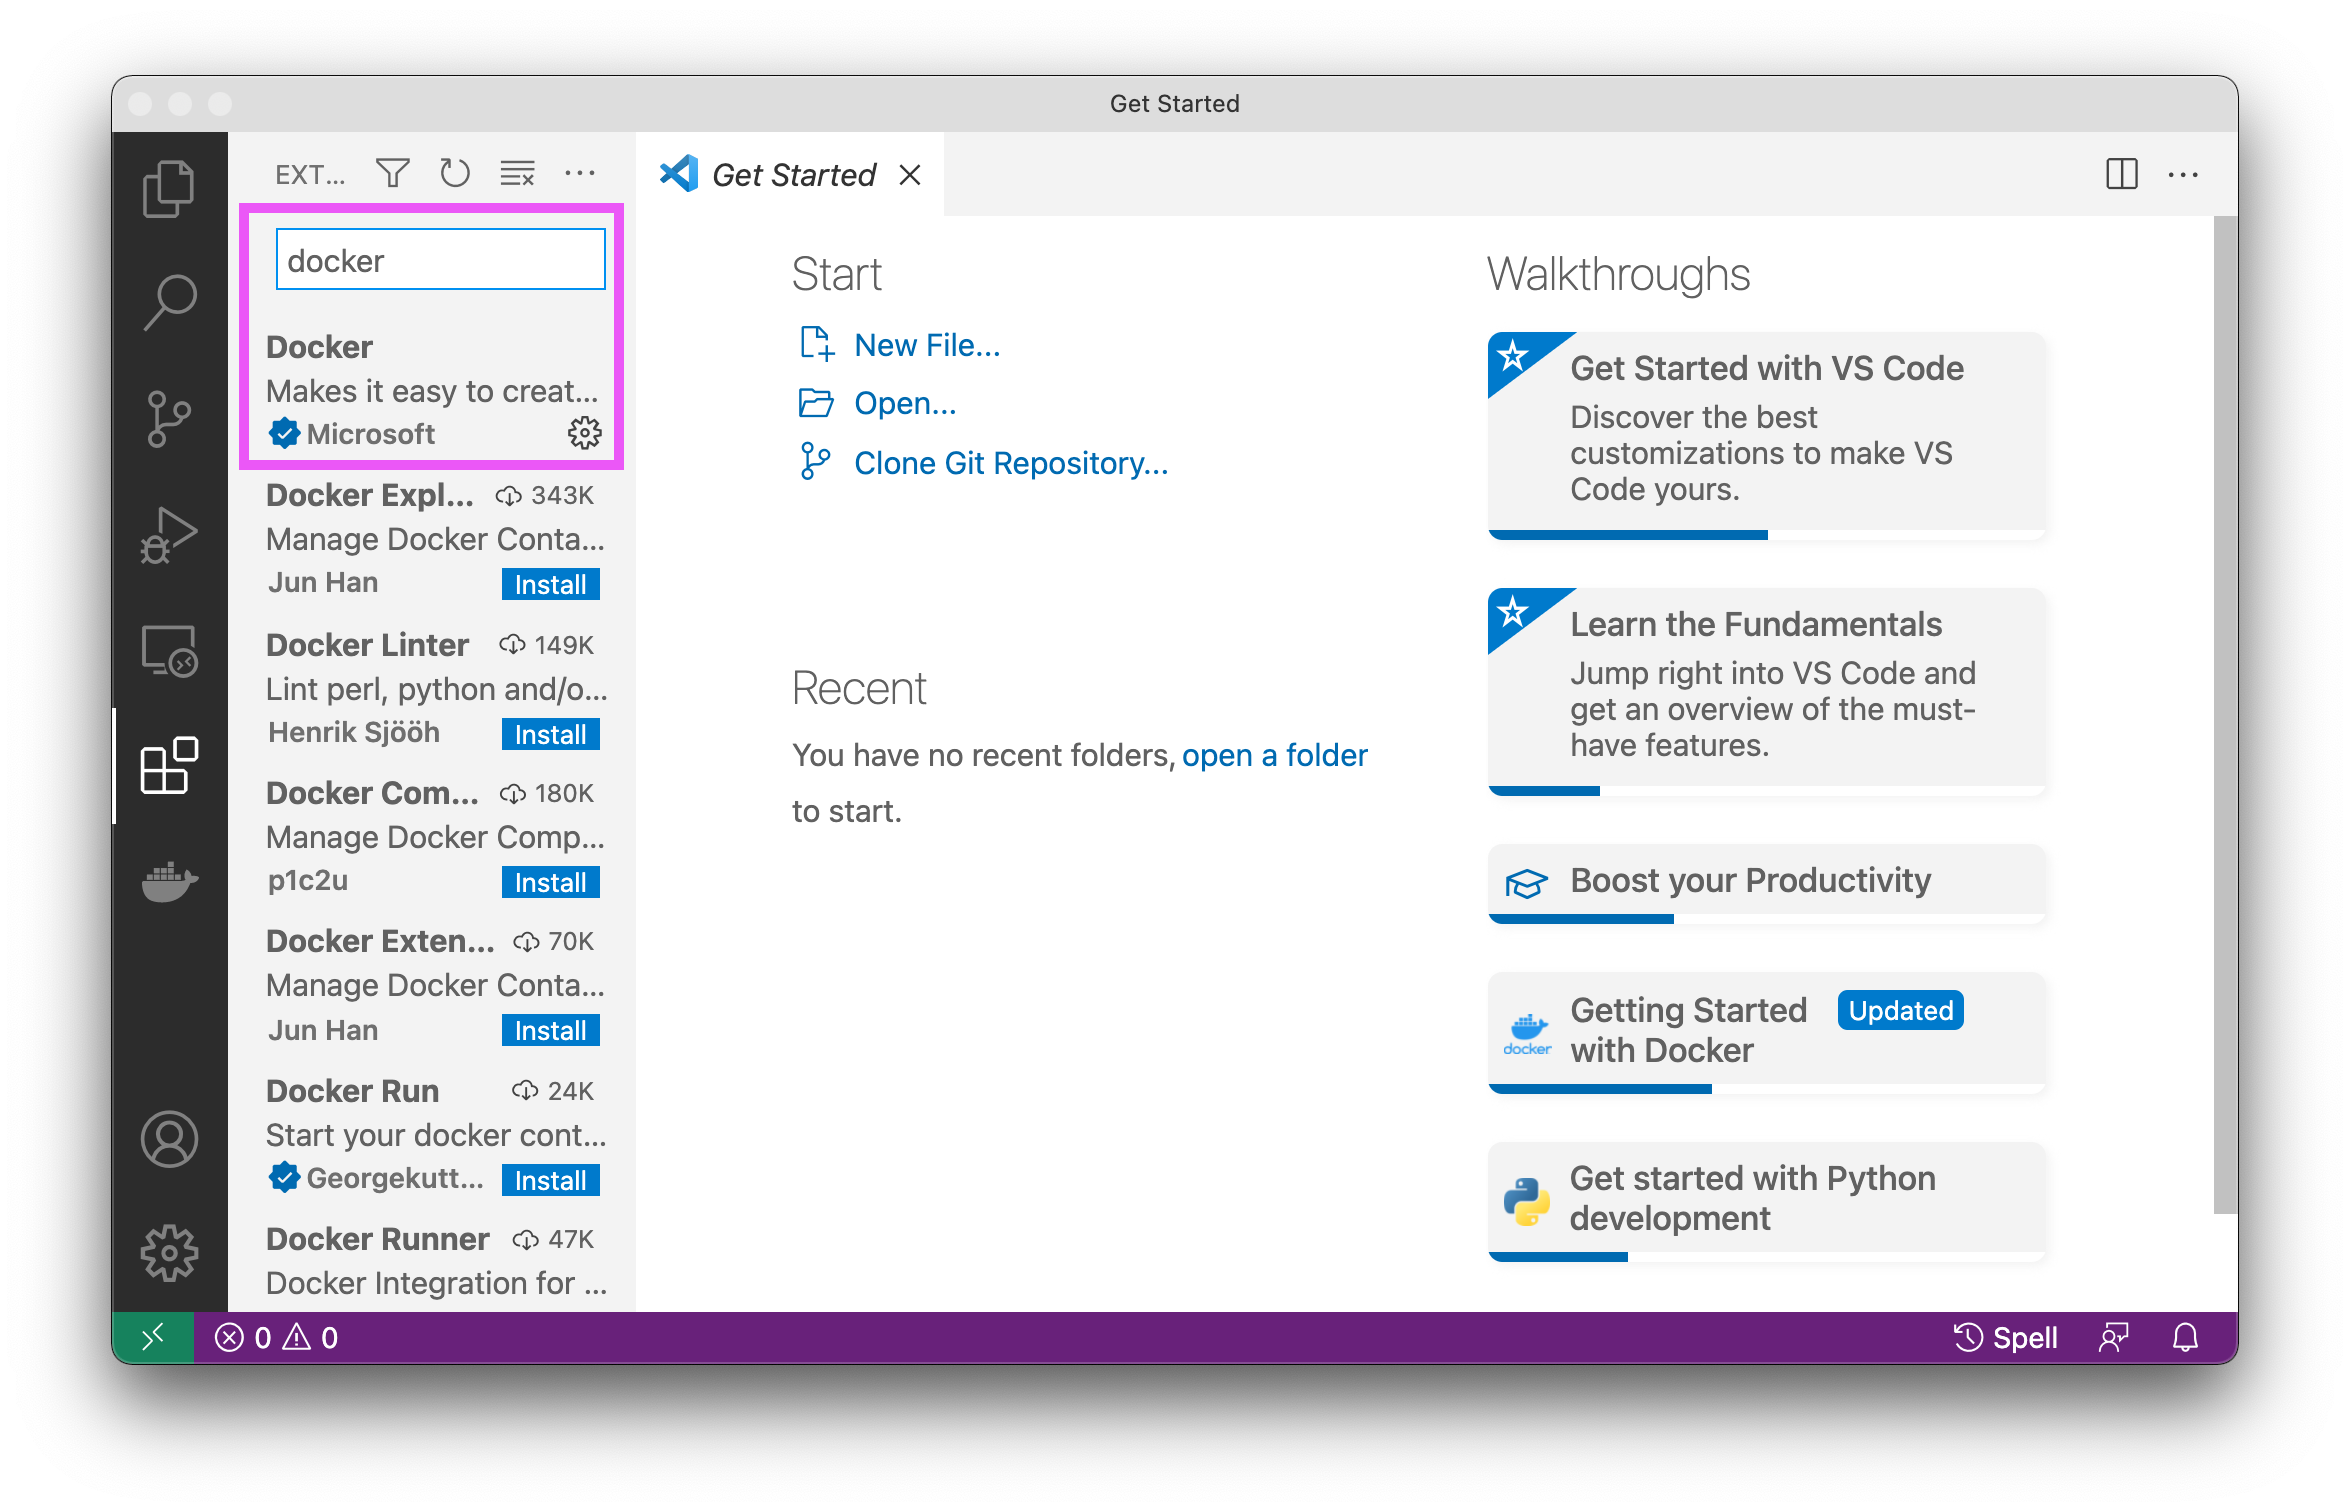
Figure 2.3: Install the Docker Extension from Microsoft
2.2.3 3 - Confirm Docker
Confirm that your Docker extension works by clicking on the Docker whale icon. You’ll see something similar to this:
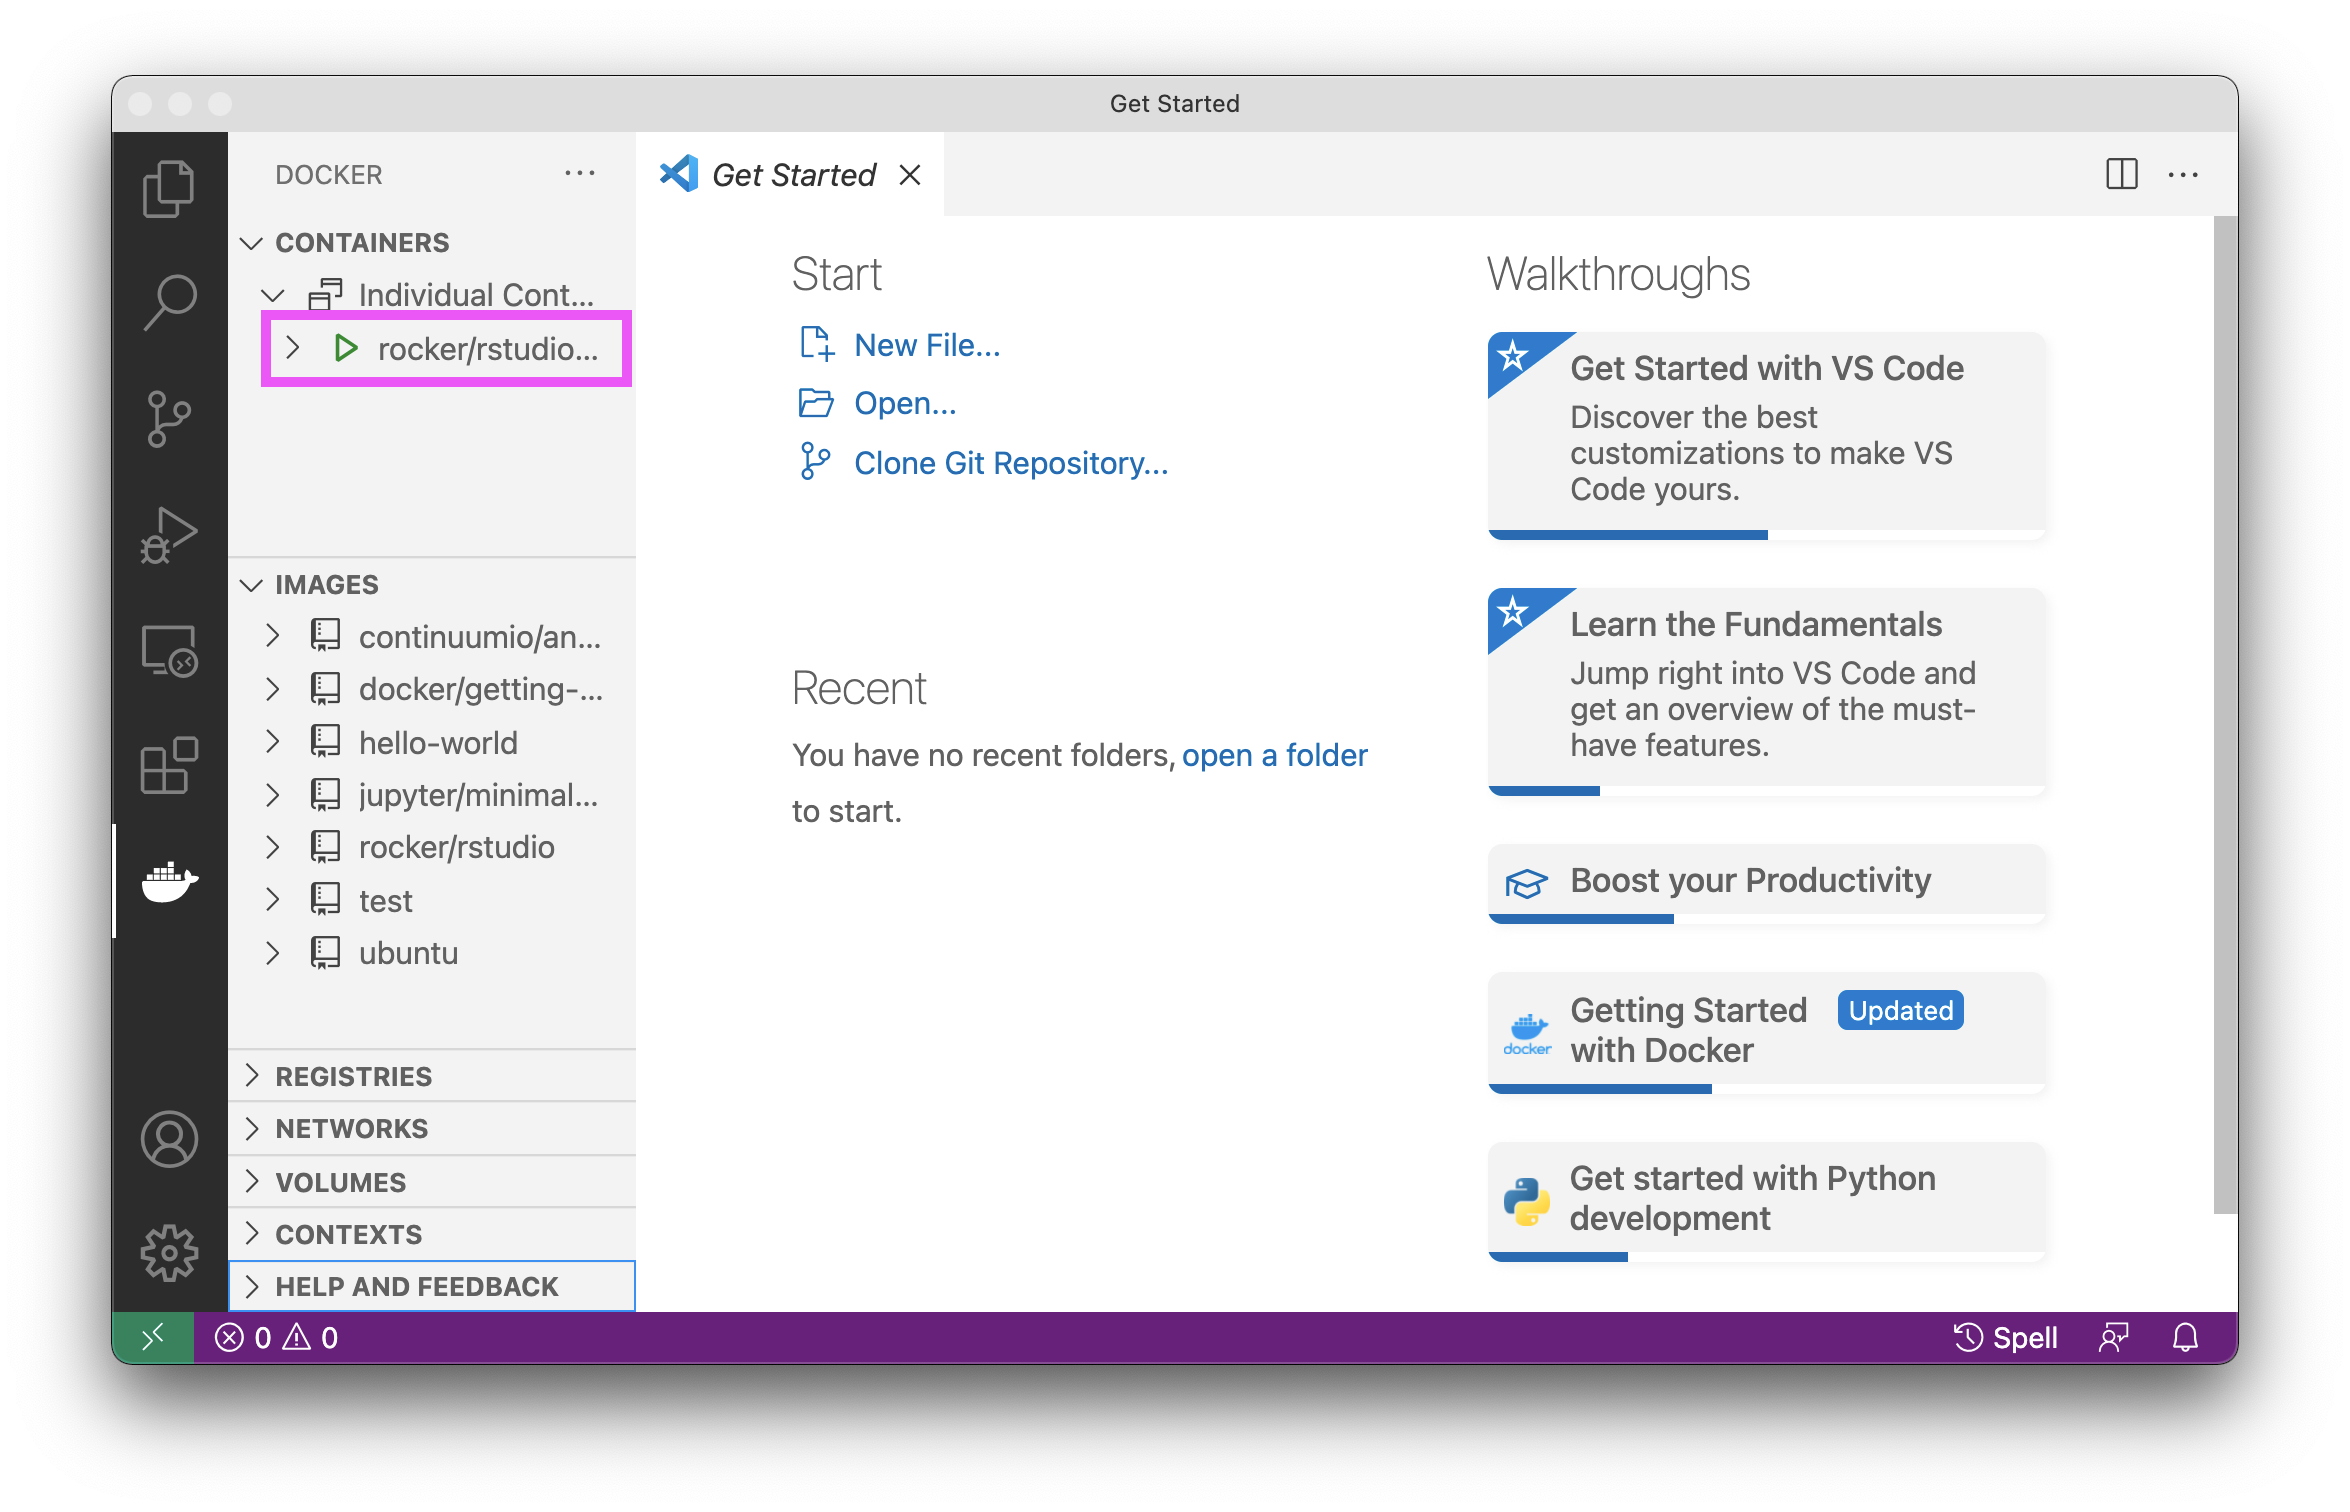
Figure 2.4: The VS Code Docker Extension, with a running container
Notice that it lists one container, which is the container we created from therocker/rstudio image in the R section. In the image avoge, it has a green arrow, because, we we can see in the Docker Desktop app, it’s still running in the background 3.
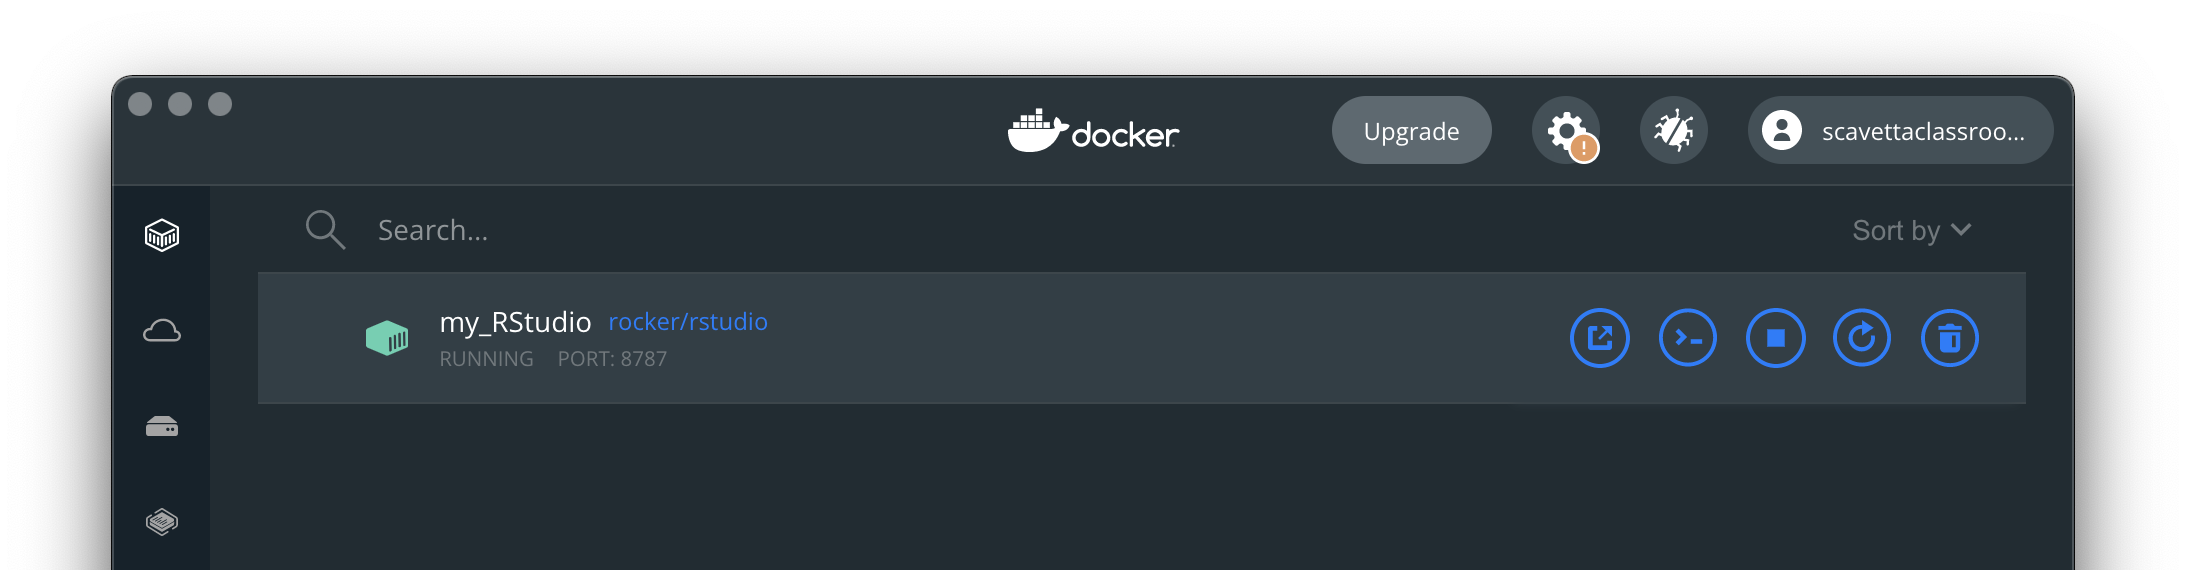
Figure 2.5: Running containers in Docker Desktop
Clicking on the stop button will close the container:
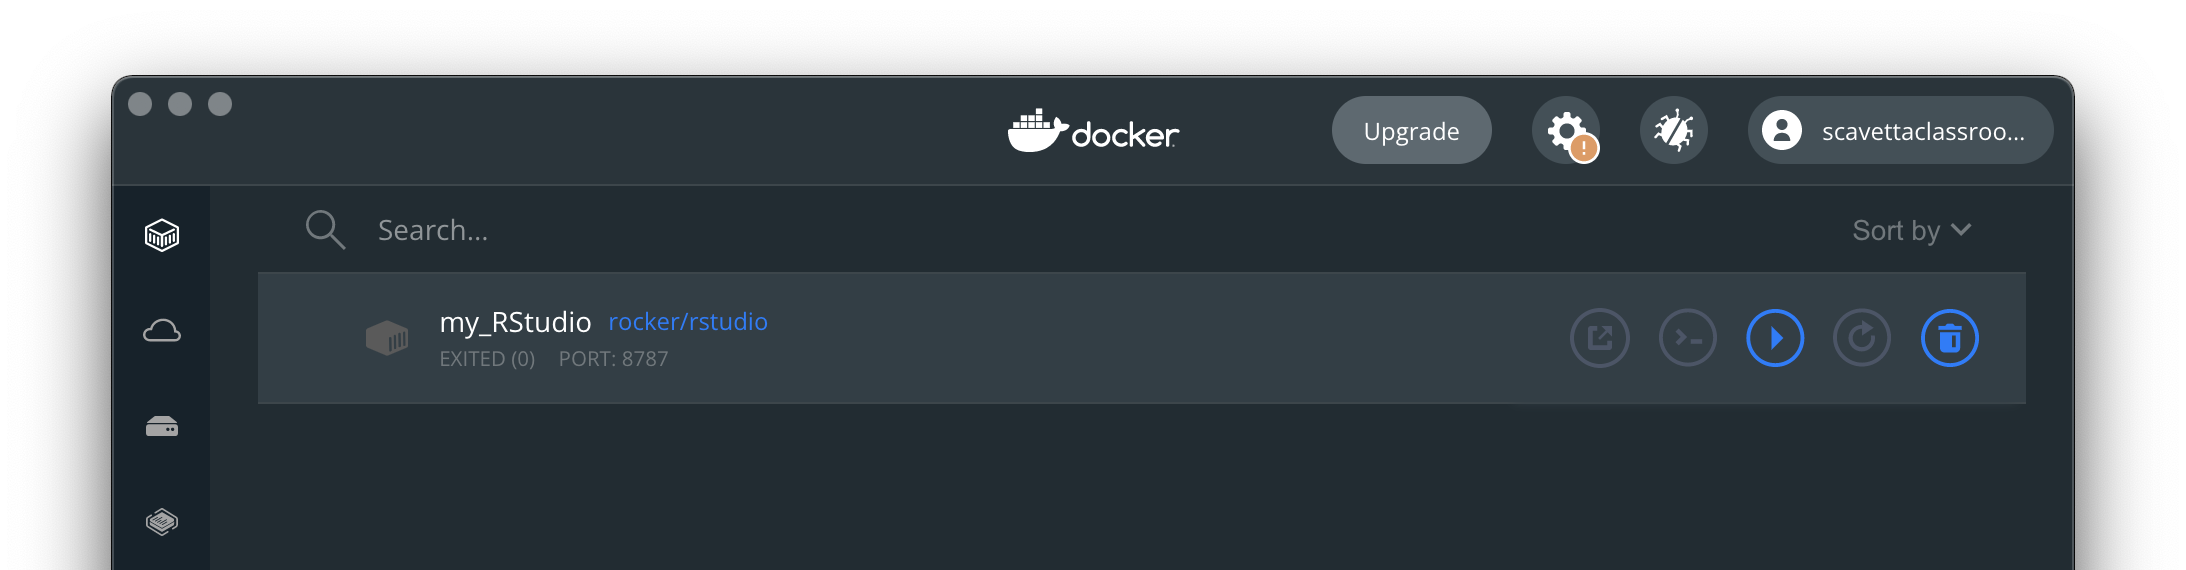
Figure 2.6: Stopped container in Docker Desktop
And its status will be automatically updated in the VS Code Docker extension:
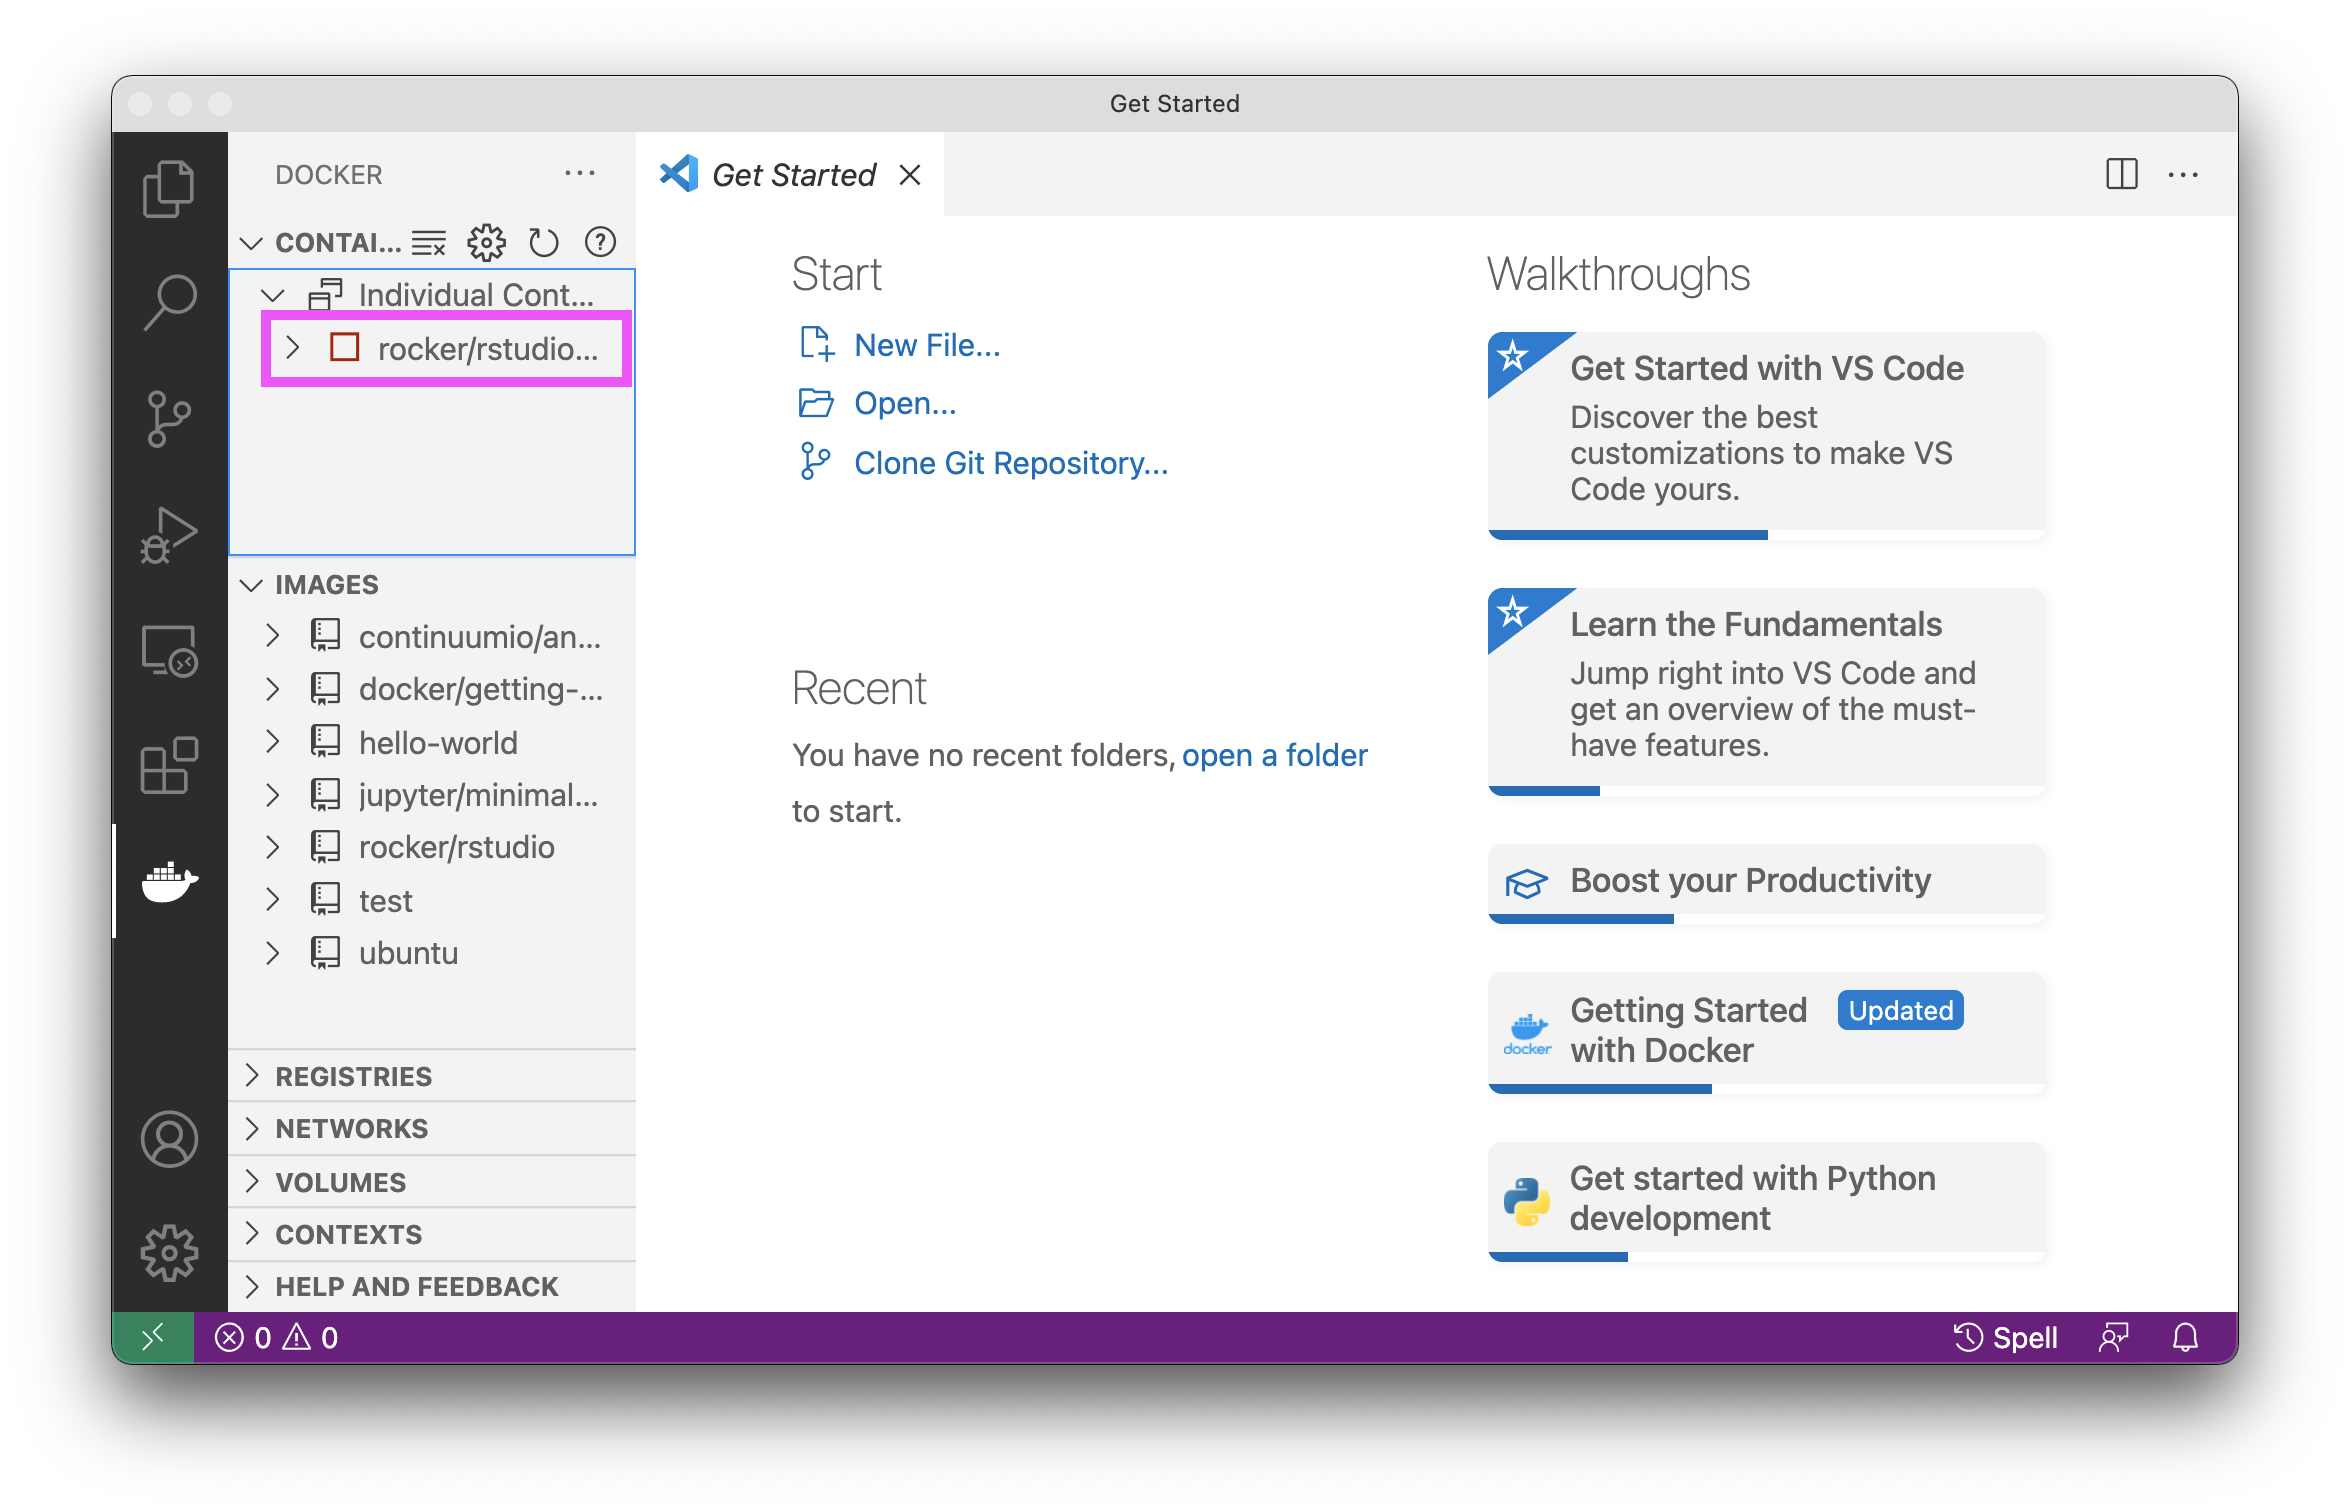
Figure 2.7: Stopped container in the The VS Code Docker Extension
Notice also that in the Images tab, you’ll see all the images that you’ve pulled from the Docker Hub repository.
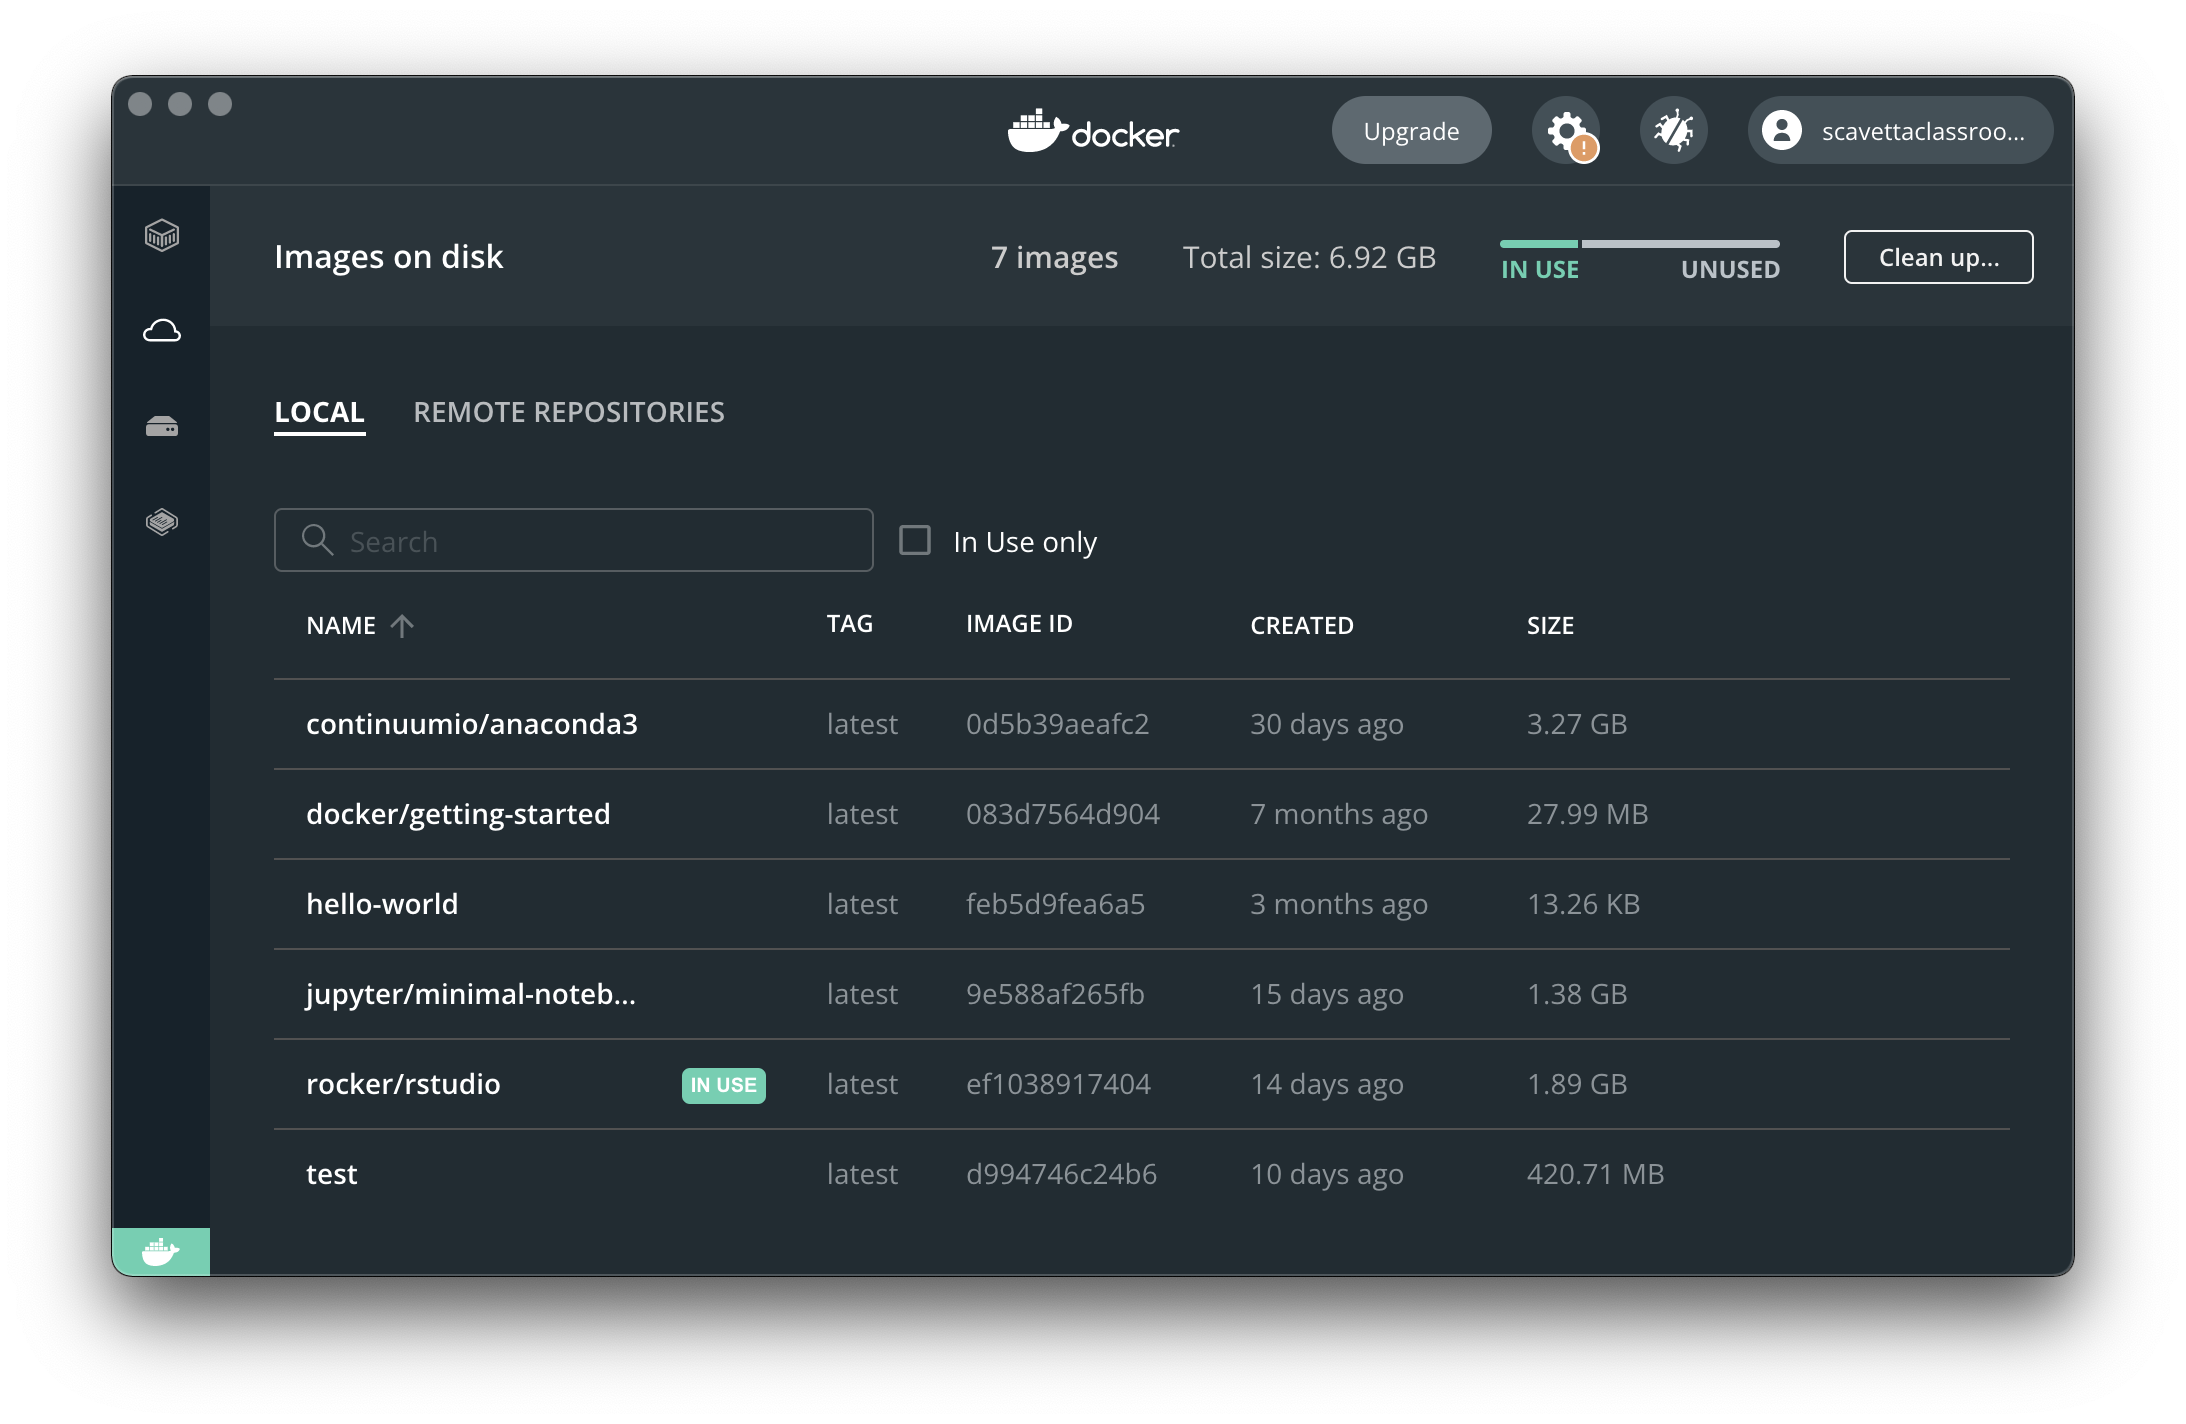
Figure 2.8: Pulled images
Go through the Getting Started guides for working with Docker and for Python development that you’ll find on the Get Started page in VS Code.
NB. These are generalist introductions and not all material are interesting for us.
2.3 Docker images for Python
There are a number of Docker images we can use to get set up with Python. The simplest option will be to use one of the anaconda images. Anaconda is a packaged distribution of Python tailored to the needs of data scientists. To be clear, it is not necessary to use Anaconda, but it will get you up and running quickly. Although tge full anaconda installation is available in the continuumio/anaconda3 image, we’ll use miniconda, found in the continuumio/miniconda3 image. Miniconda, as the name suggests,m contains the bare minimum of what is needed for a data science Python environment. You can find documentation here.
We can pull the image (docker pull ...) and set up a container ourselves (docker run ...), but we can also let the Docker extension in VS Code do the work for us. Follow these instructions:
- Once you have the Docker extension installed, you’ll see a green “Open a Remote Window” icon in the lower left corner of any VS Code screen, like the Get Started pages, shown below. (NB. You can always return to the Get Started page by using the menu
Help > Get Started).
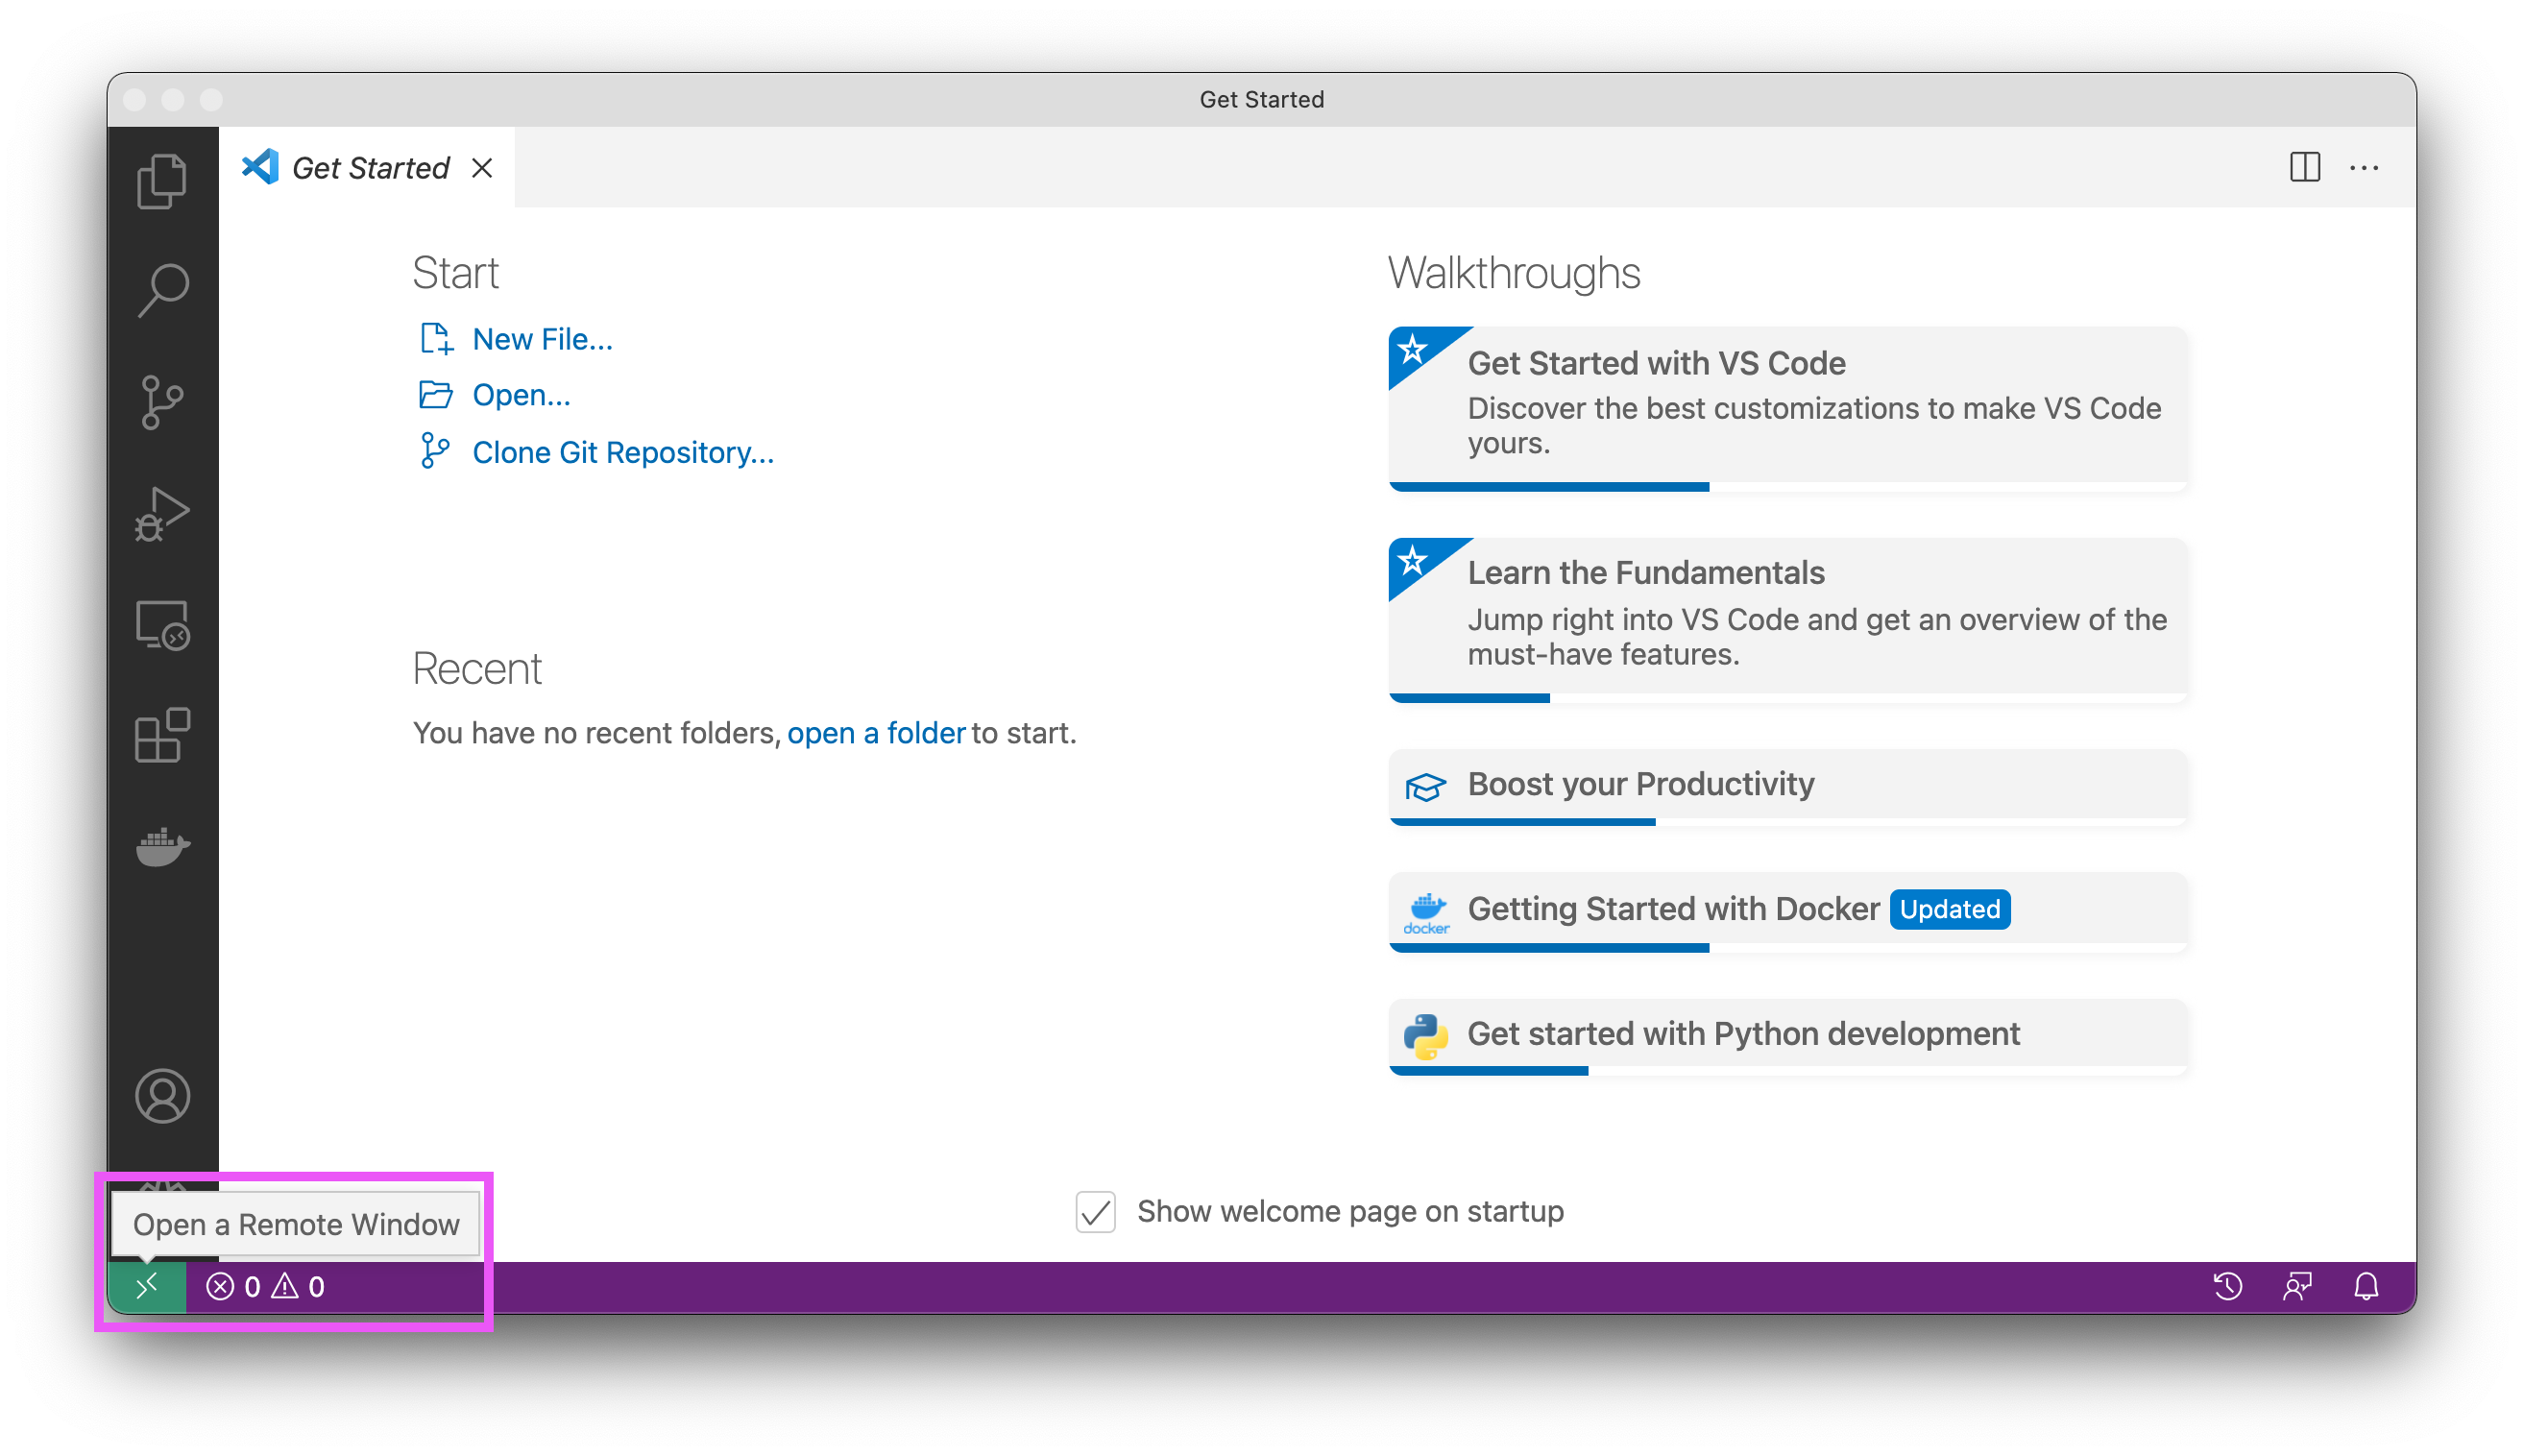
Figure 2.9: Accessing a Remote Window in VS Code
This will launch the Command Panel, which you can also manually access using ctrl + shift + p.
- Choose the first command, “Open Folder in Container…”, as shown below.
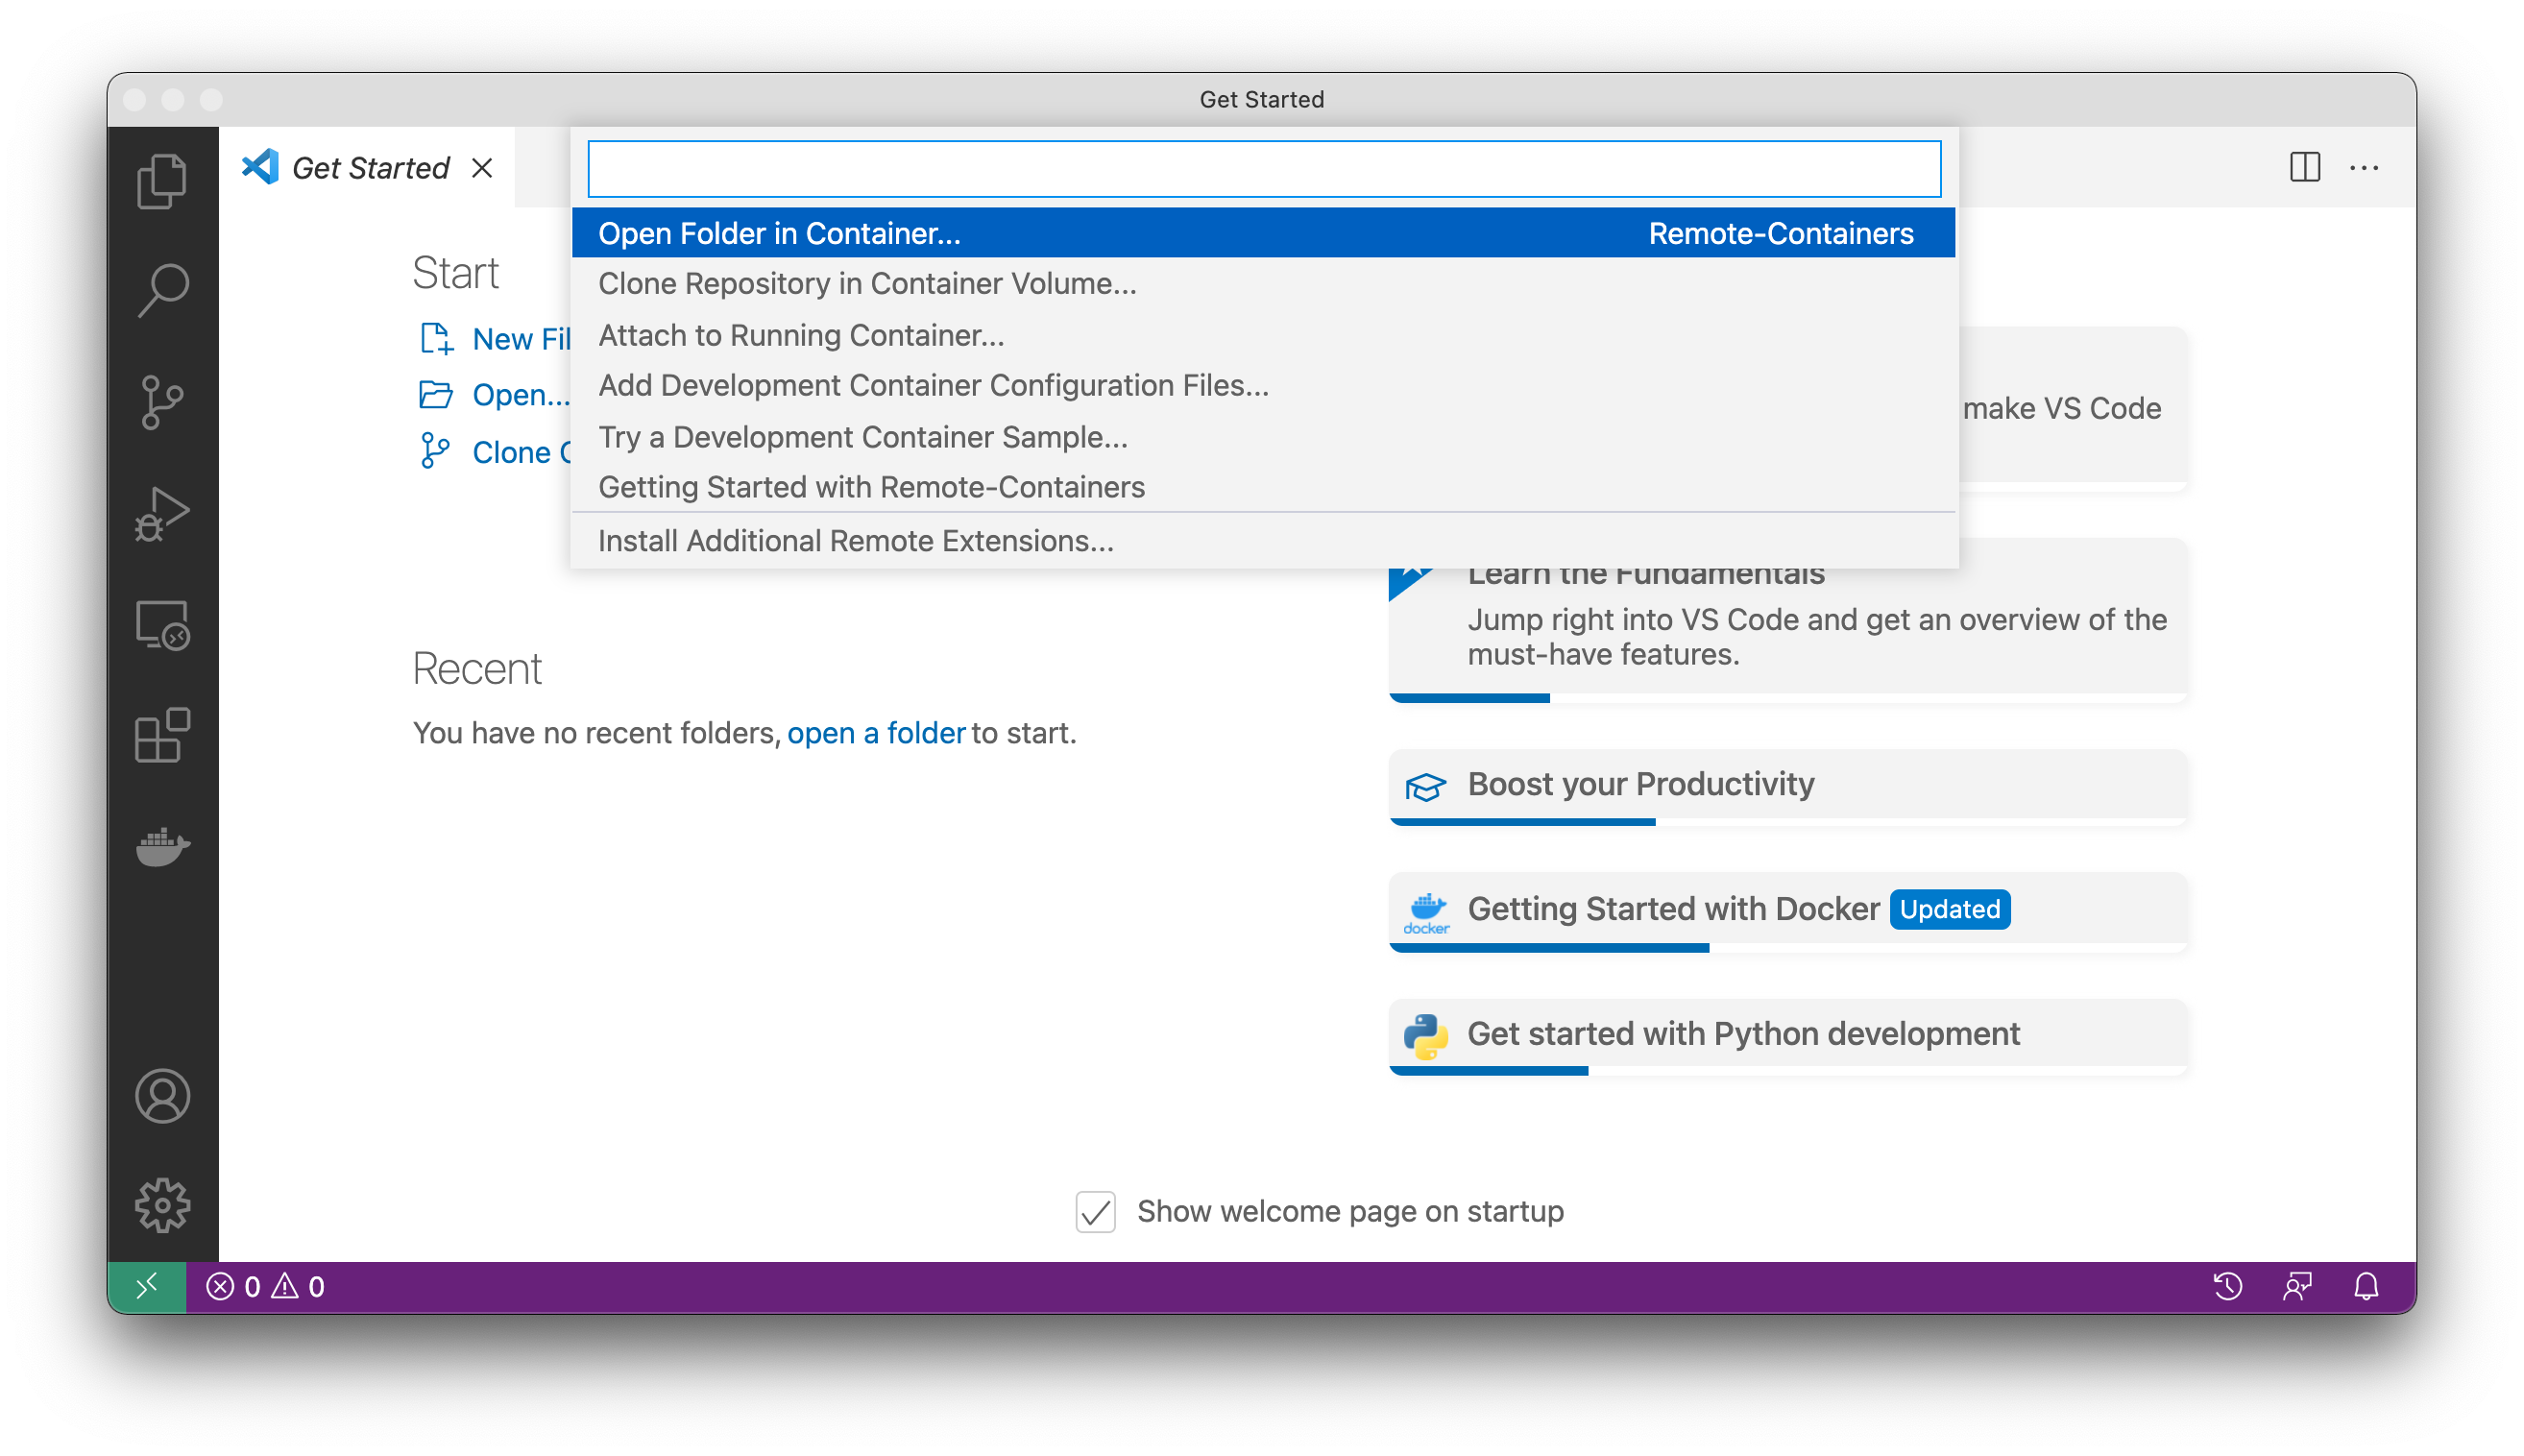
Figure 2.10: The Command Panel in VS Code
In the new Finder/Explorer window, navigate to the folder containing your local git repo of our course data & script files:
Misk_DSI_2022After selecting this folder, you’ll be asked what kind of environment you want to work in. The most suitable environments will be listed. In our case choose
Anaconda (Python 3).
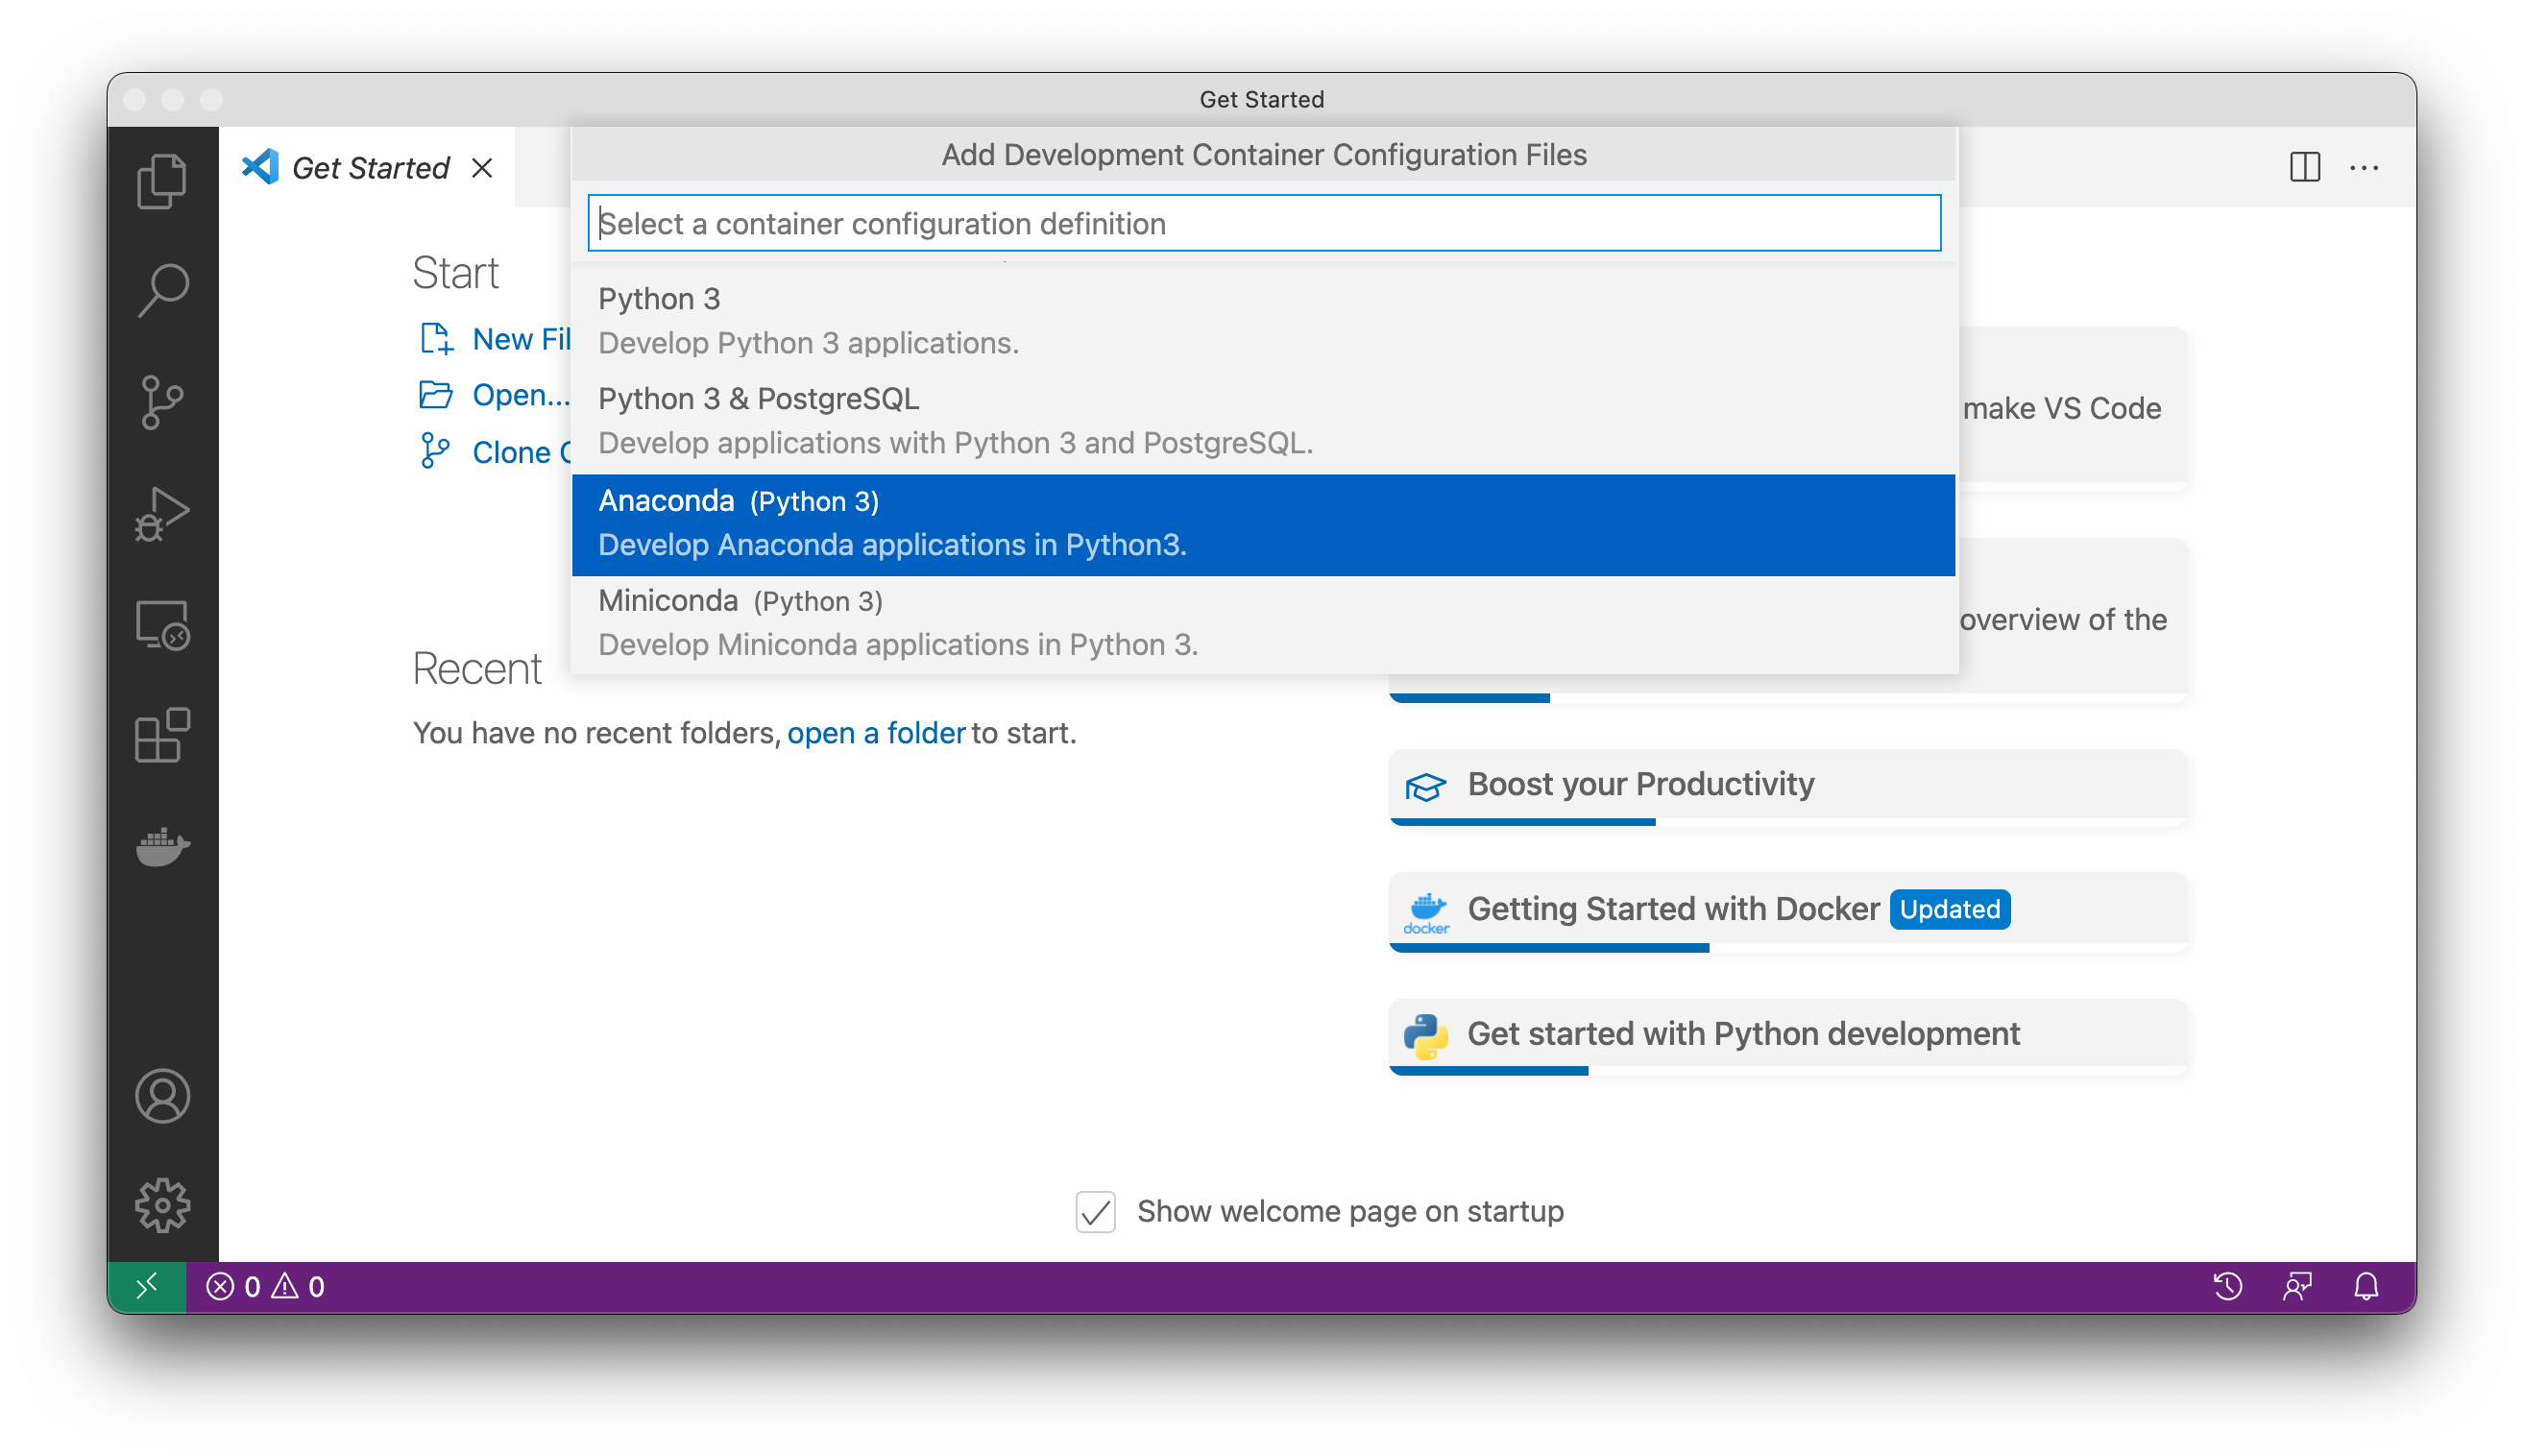
Figure 2.11: Select a development environment for your project
- Next you’ll be asked which version of node.js to install. We don’t need this so just choose none.
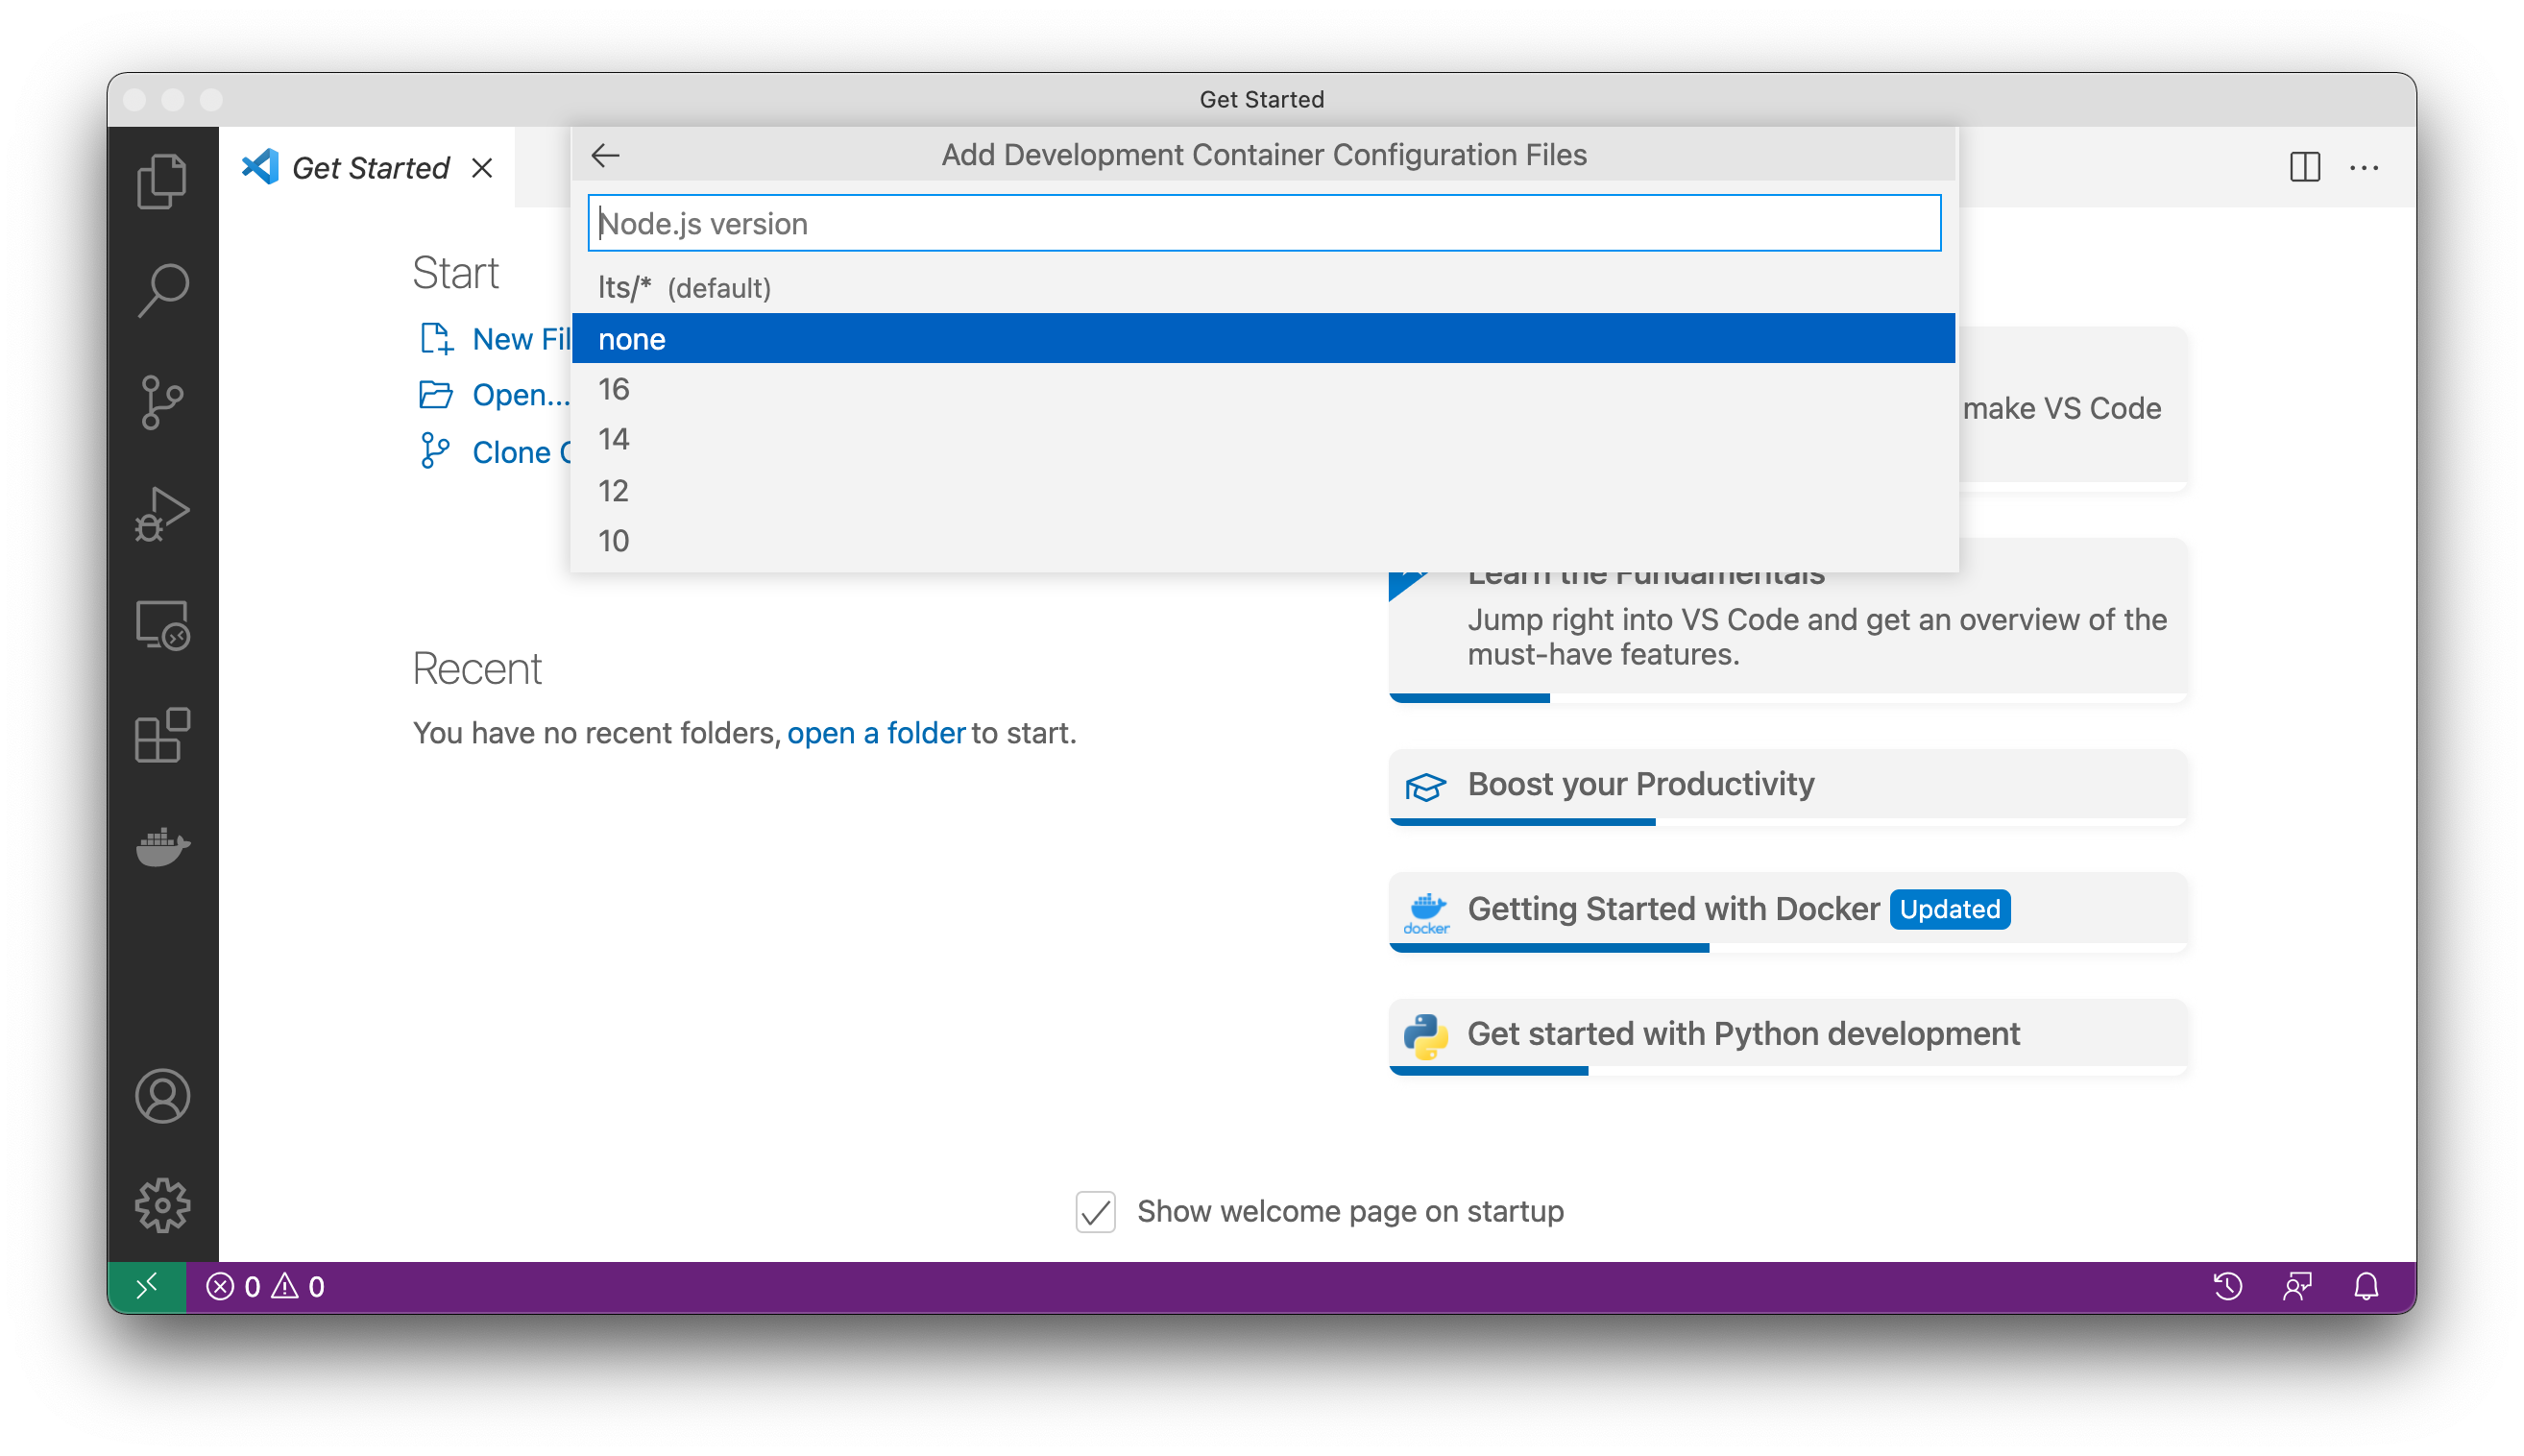
Figure 2.12: node.js is not needed for our project.
- Install
gitwhen asked to do so in the next step. This is not strictly necessary, but will be useful for monitoring file changes.

Figure 2.13: Install git in our project image.
- Click “Go” and choose to the latest version of
git.
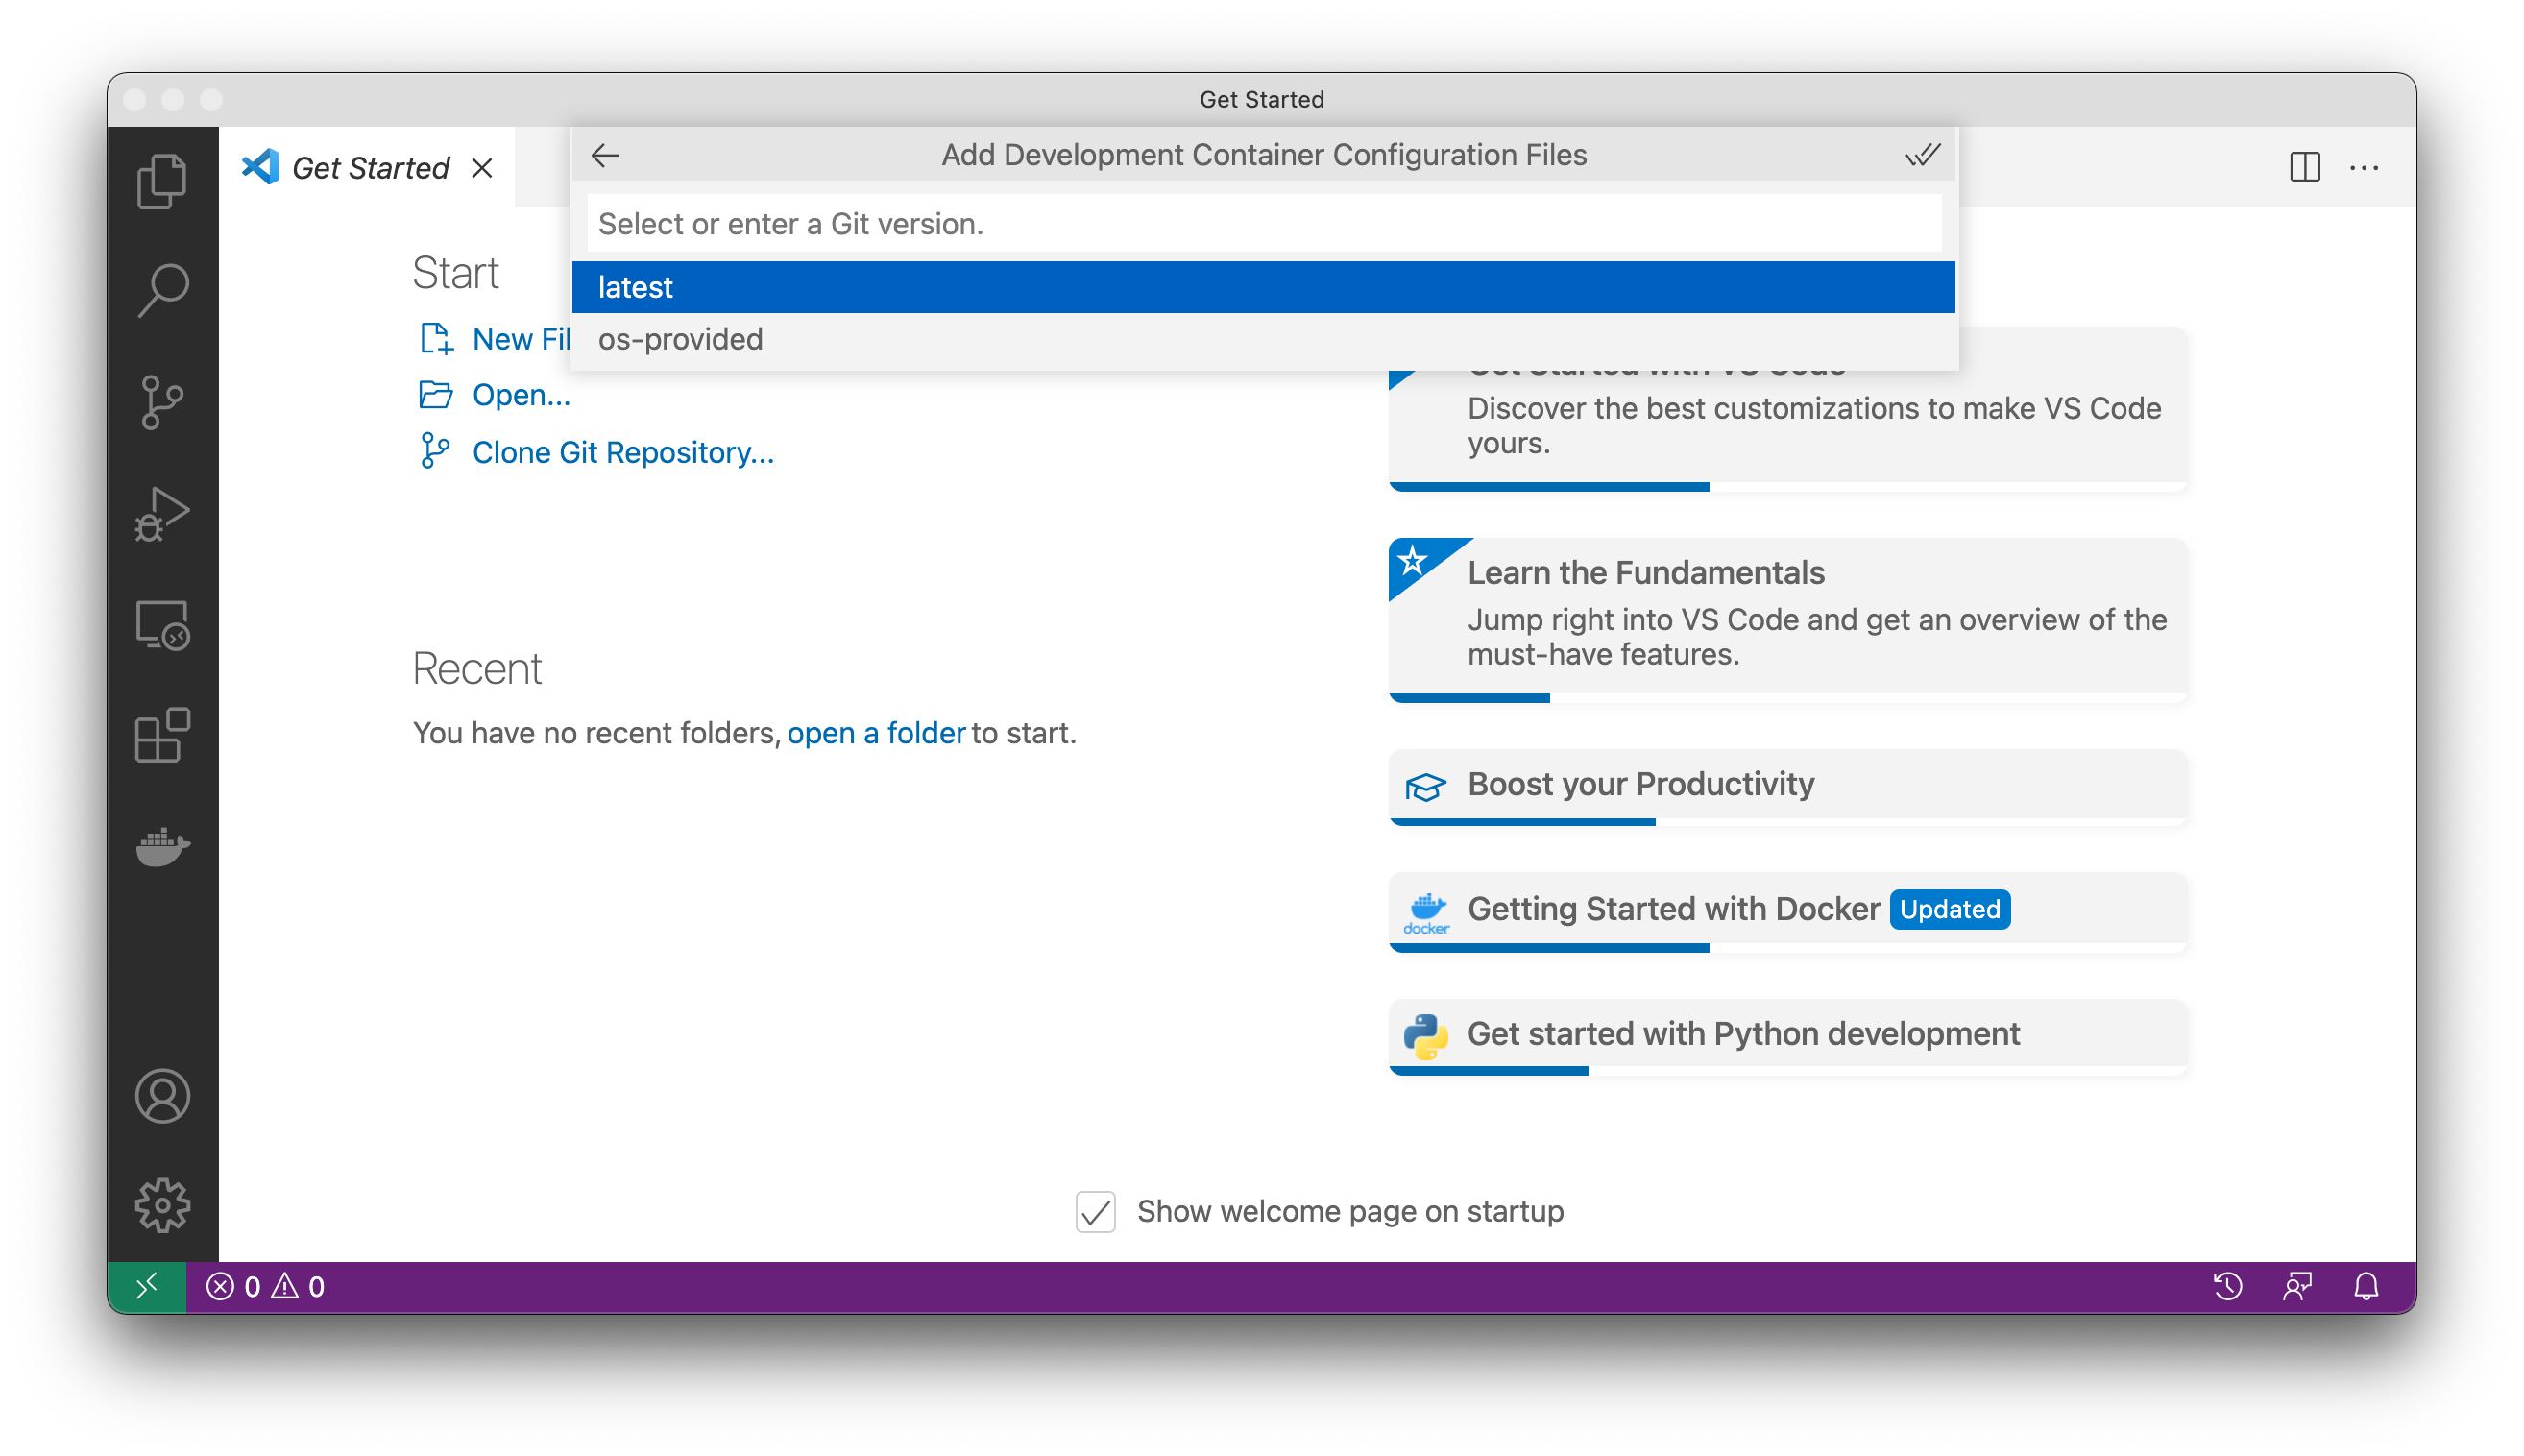
Figure 2.14: Install the latest git version.
- The image will be pulled from Docker Hub and a container will be spun up. This may take a couple minutes!
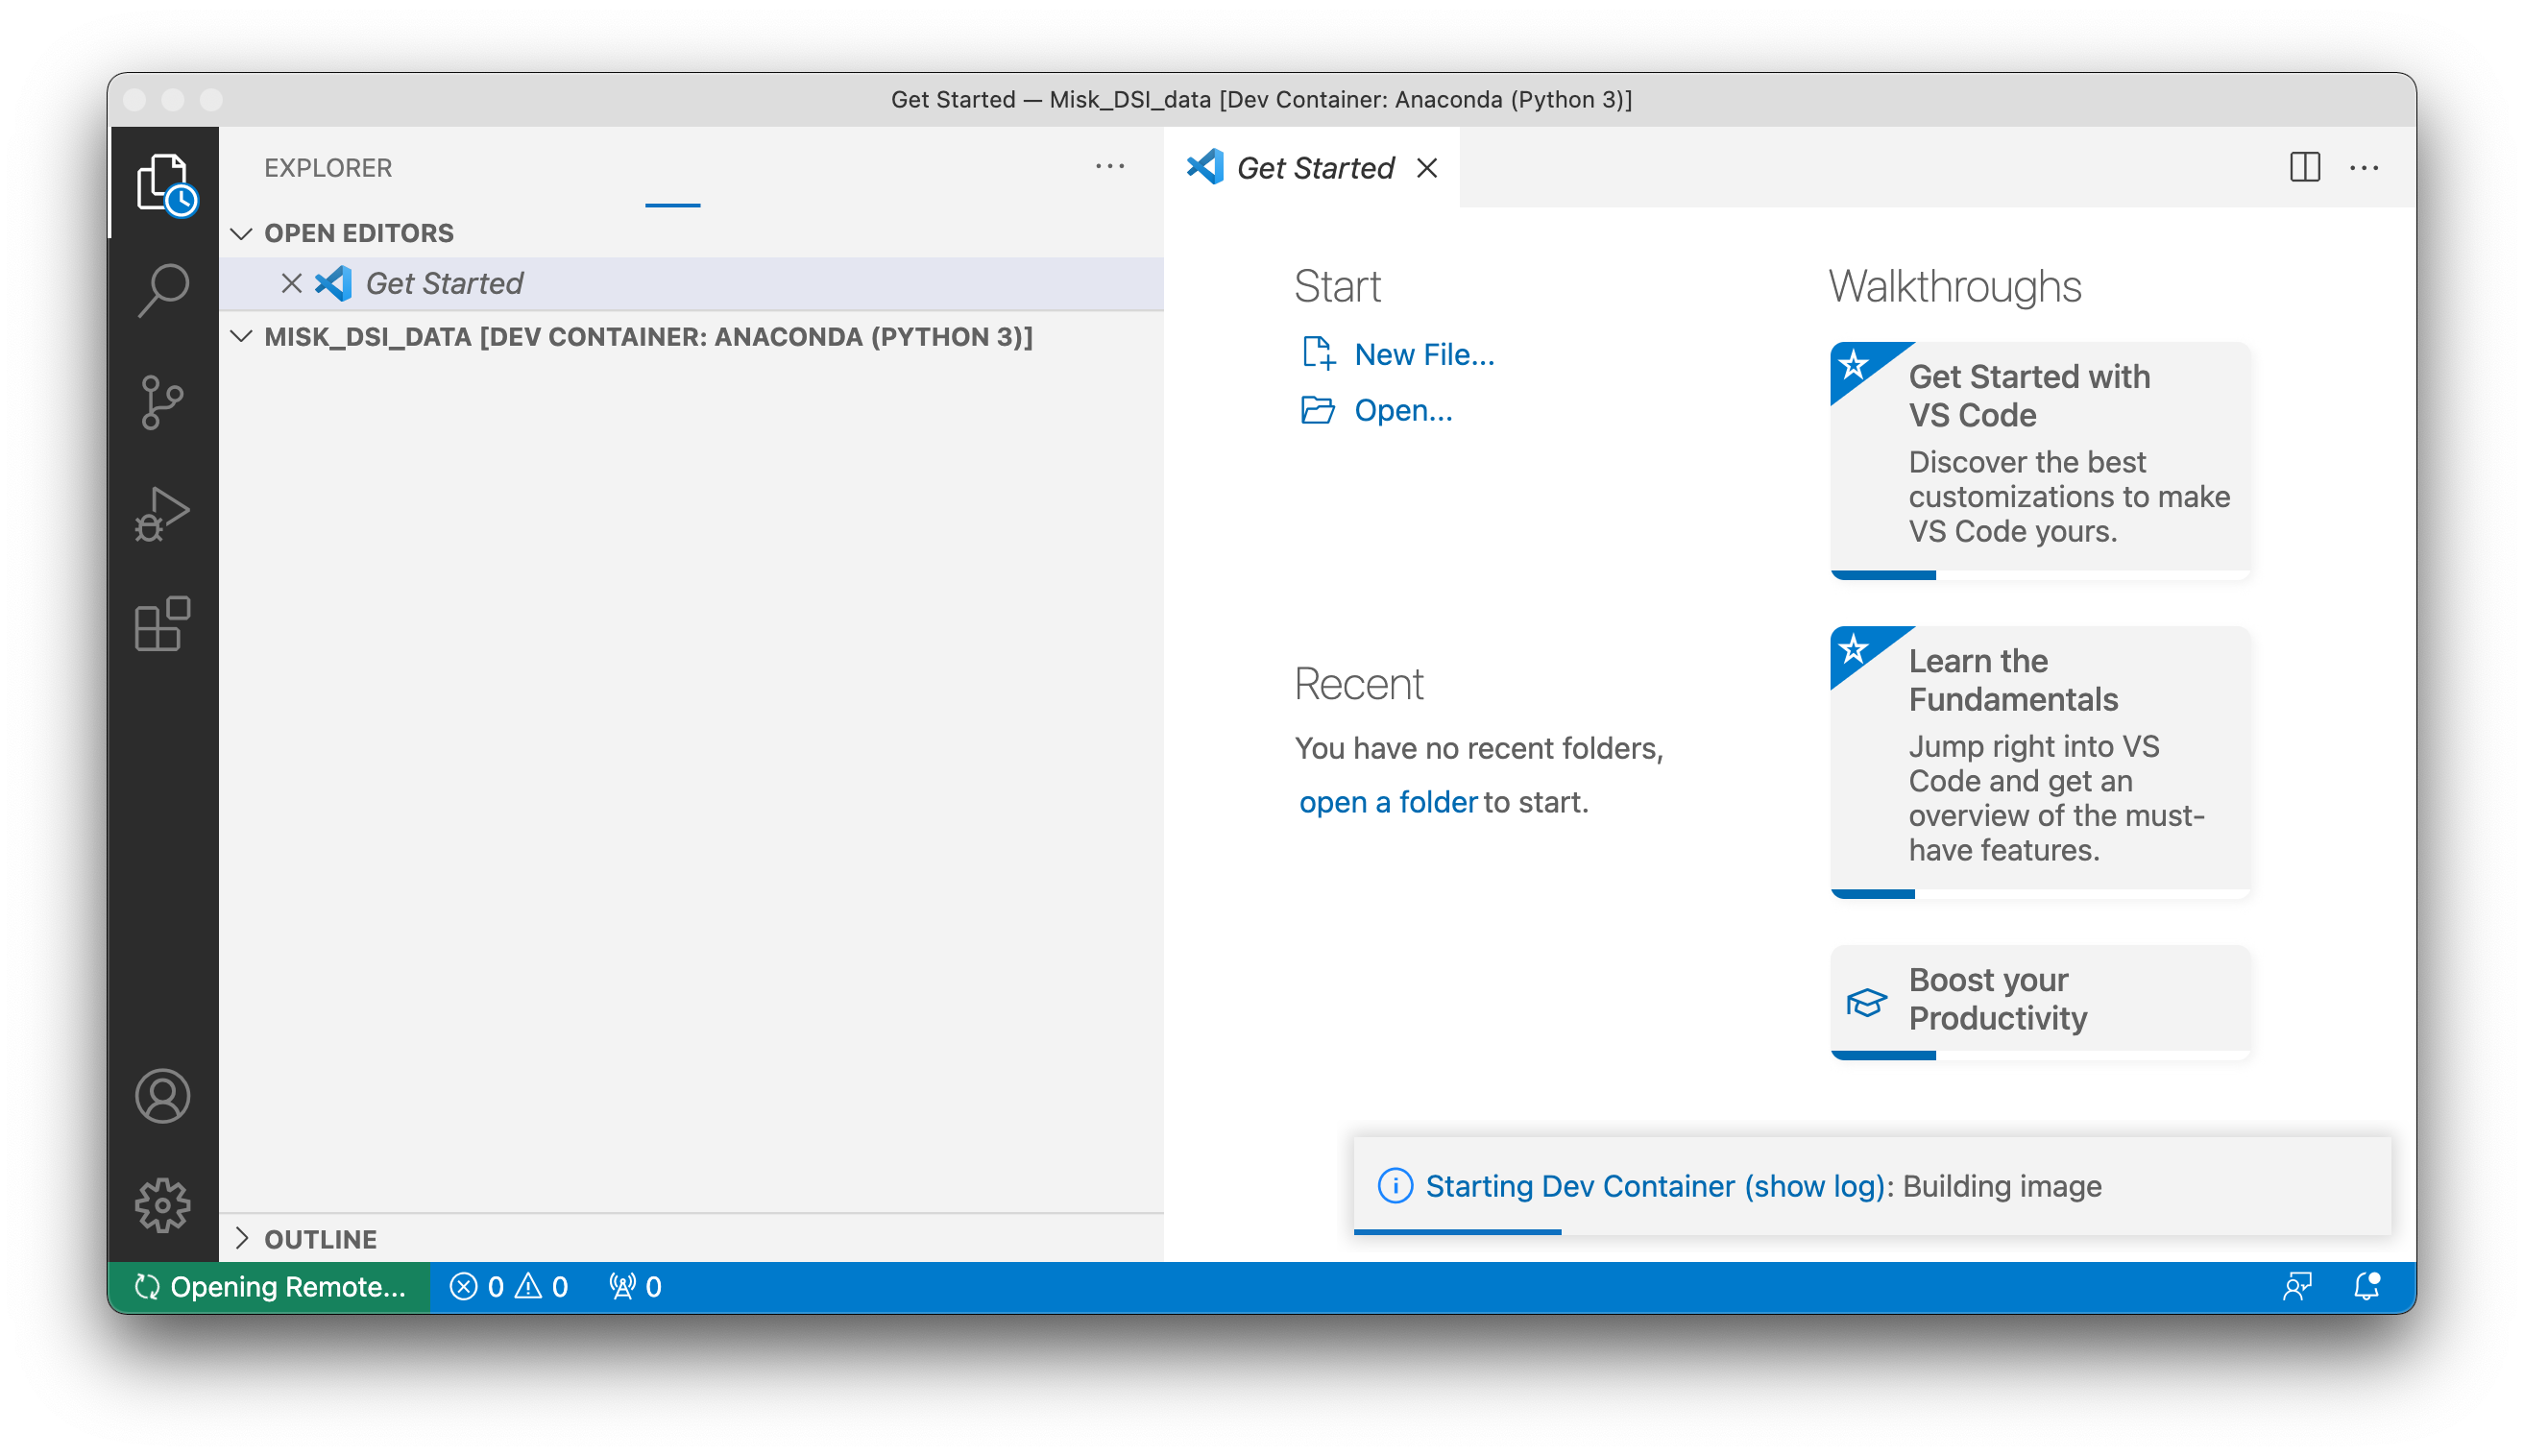
Figure 2.15: Setting up your development environment.
The Command Panel is a convenient way to access features of VS Code and its extensions using a CLI.
To execute a command begin typing the category is falls under, i.e. “Shell Command”, and a matching list will appear as you type.
One of the most commands to run is Shell Command: install `code` command in PATH. This allows you to open VS Code from the command line using code. The current working directory in the terminal will be opened as the active project folder in VS Code.
Once the process is complete you’ll notice a few changes.
First, you’ll have a new image in the Docker Desktop app, as shown below. Mine is called “gallant_cray” but this is not important. Notice that it is running and that it’s based on “vsc-misk_dsi…”. This tells us that it’s an image from VS Code associated with a local folder.
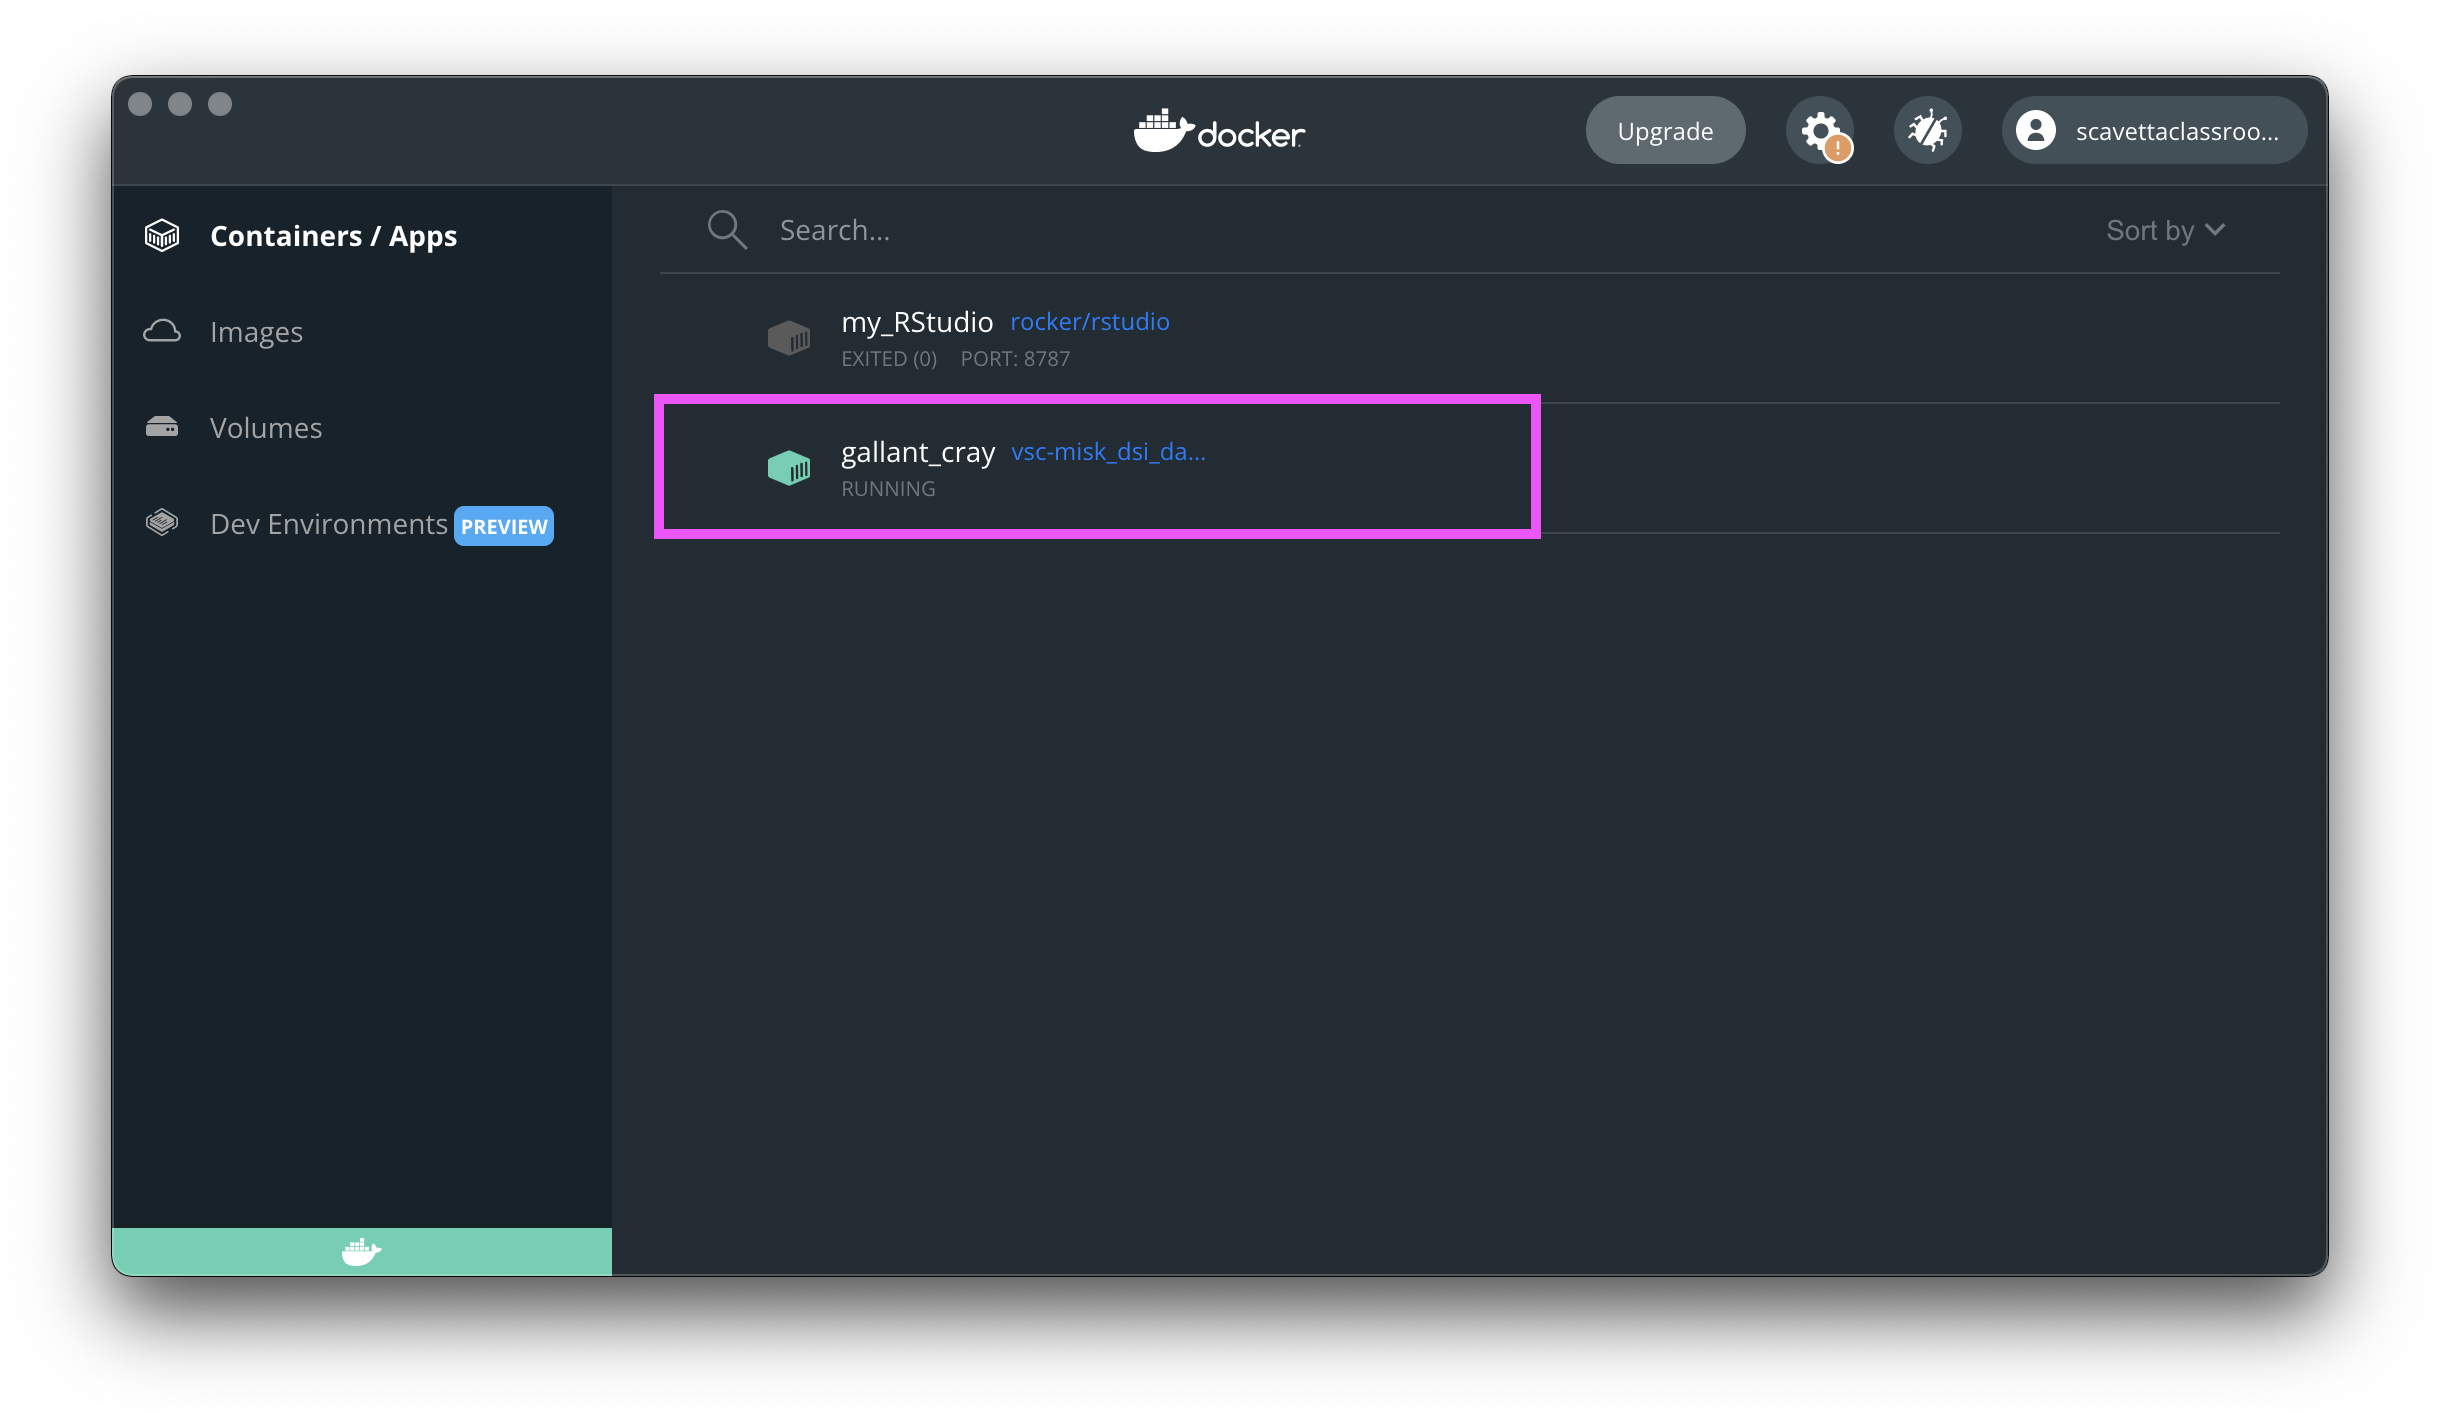
Figure 2.16: A new docker image.
Second, you have a new hidden directory, called .devcontainer inside the Misk_DSI_2022 directory. Whenever you open this folder in VS Code, the text editor will know to spin up the above container. You can automatically start working in your preferred environment without having to manually spin up the session.
Third, the Misk_DSI_2022 folder will be opened in VS Code. You can see both of these in the image below.
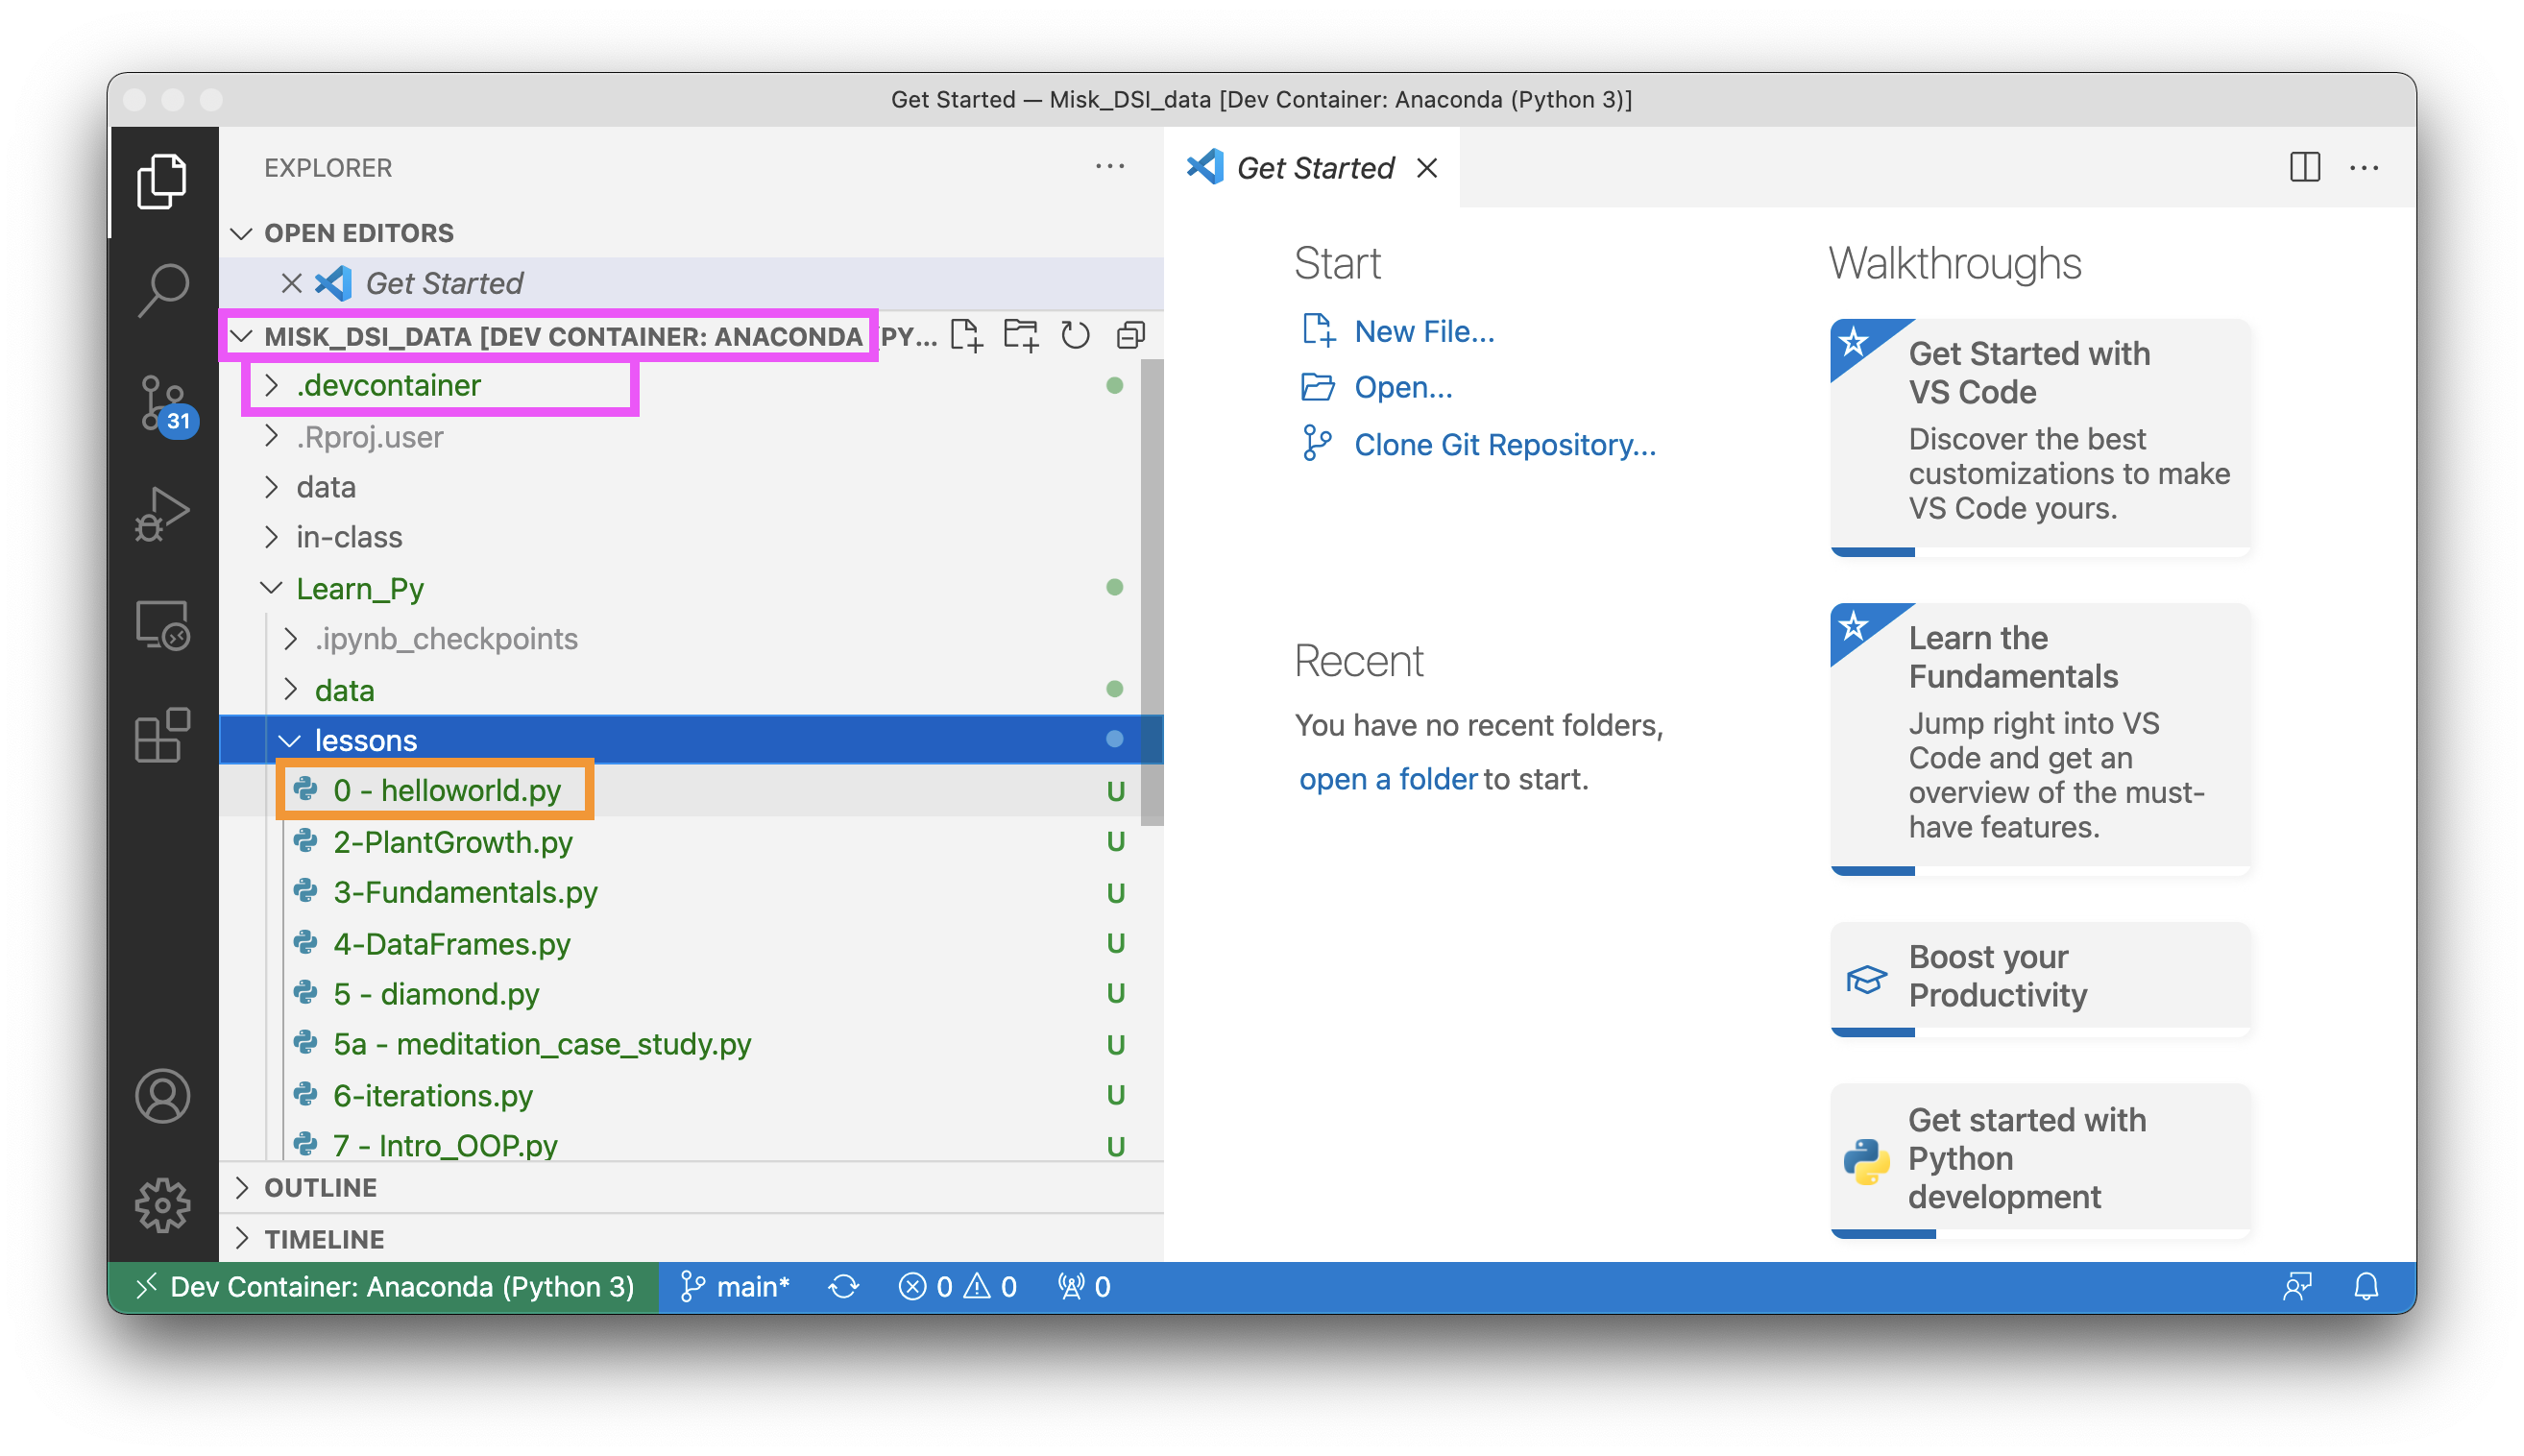
Figure 2.17: An open folder in VS Code.
To confirm that you’re operating in a new image. Open
Misk_DSI_2022 > Learn_Py > lessons > 0 - hello world.py. This file is highlighted in the orange box in the image above.Click on the two “Run Cell” labels that precede each code chunk, as shown below.
Figure 2.18: An open folder in VS Code.
- Confirm that you see the output in the following figure.
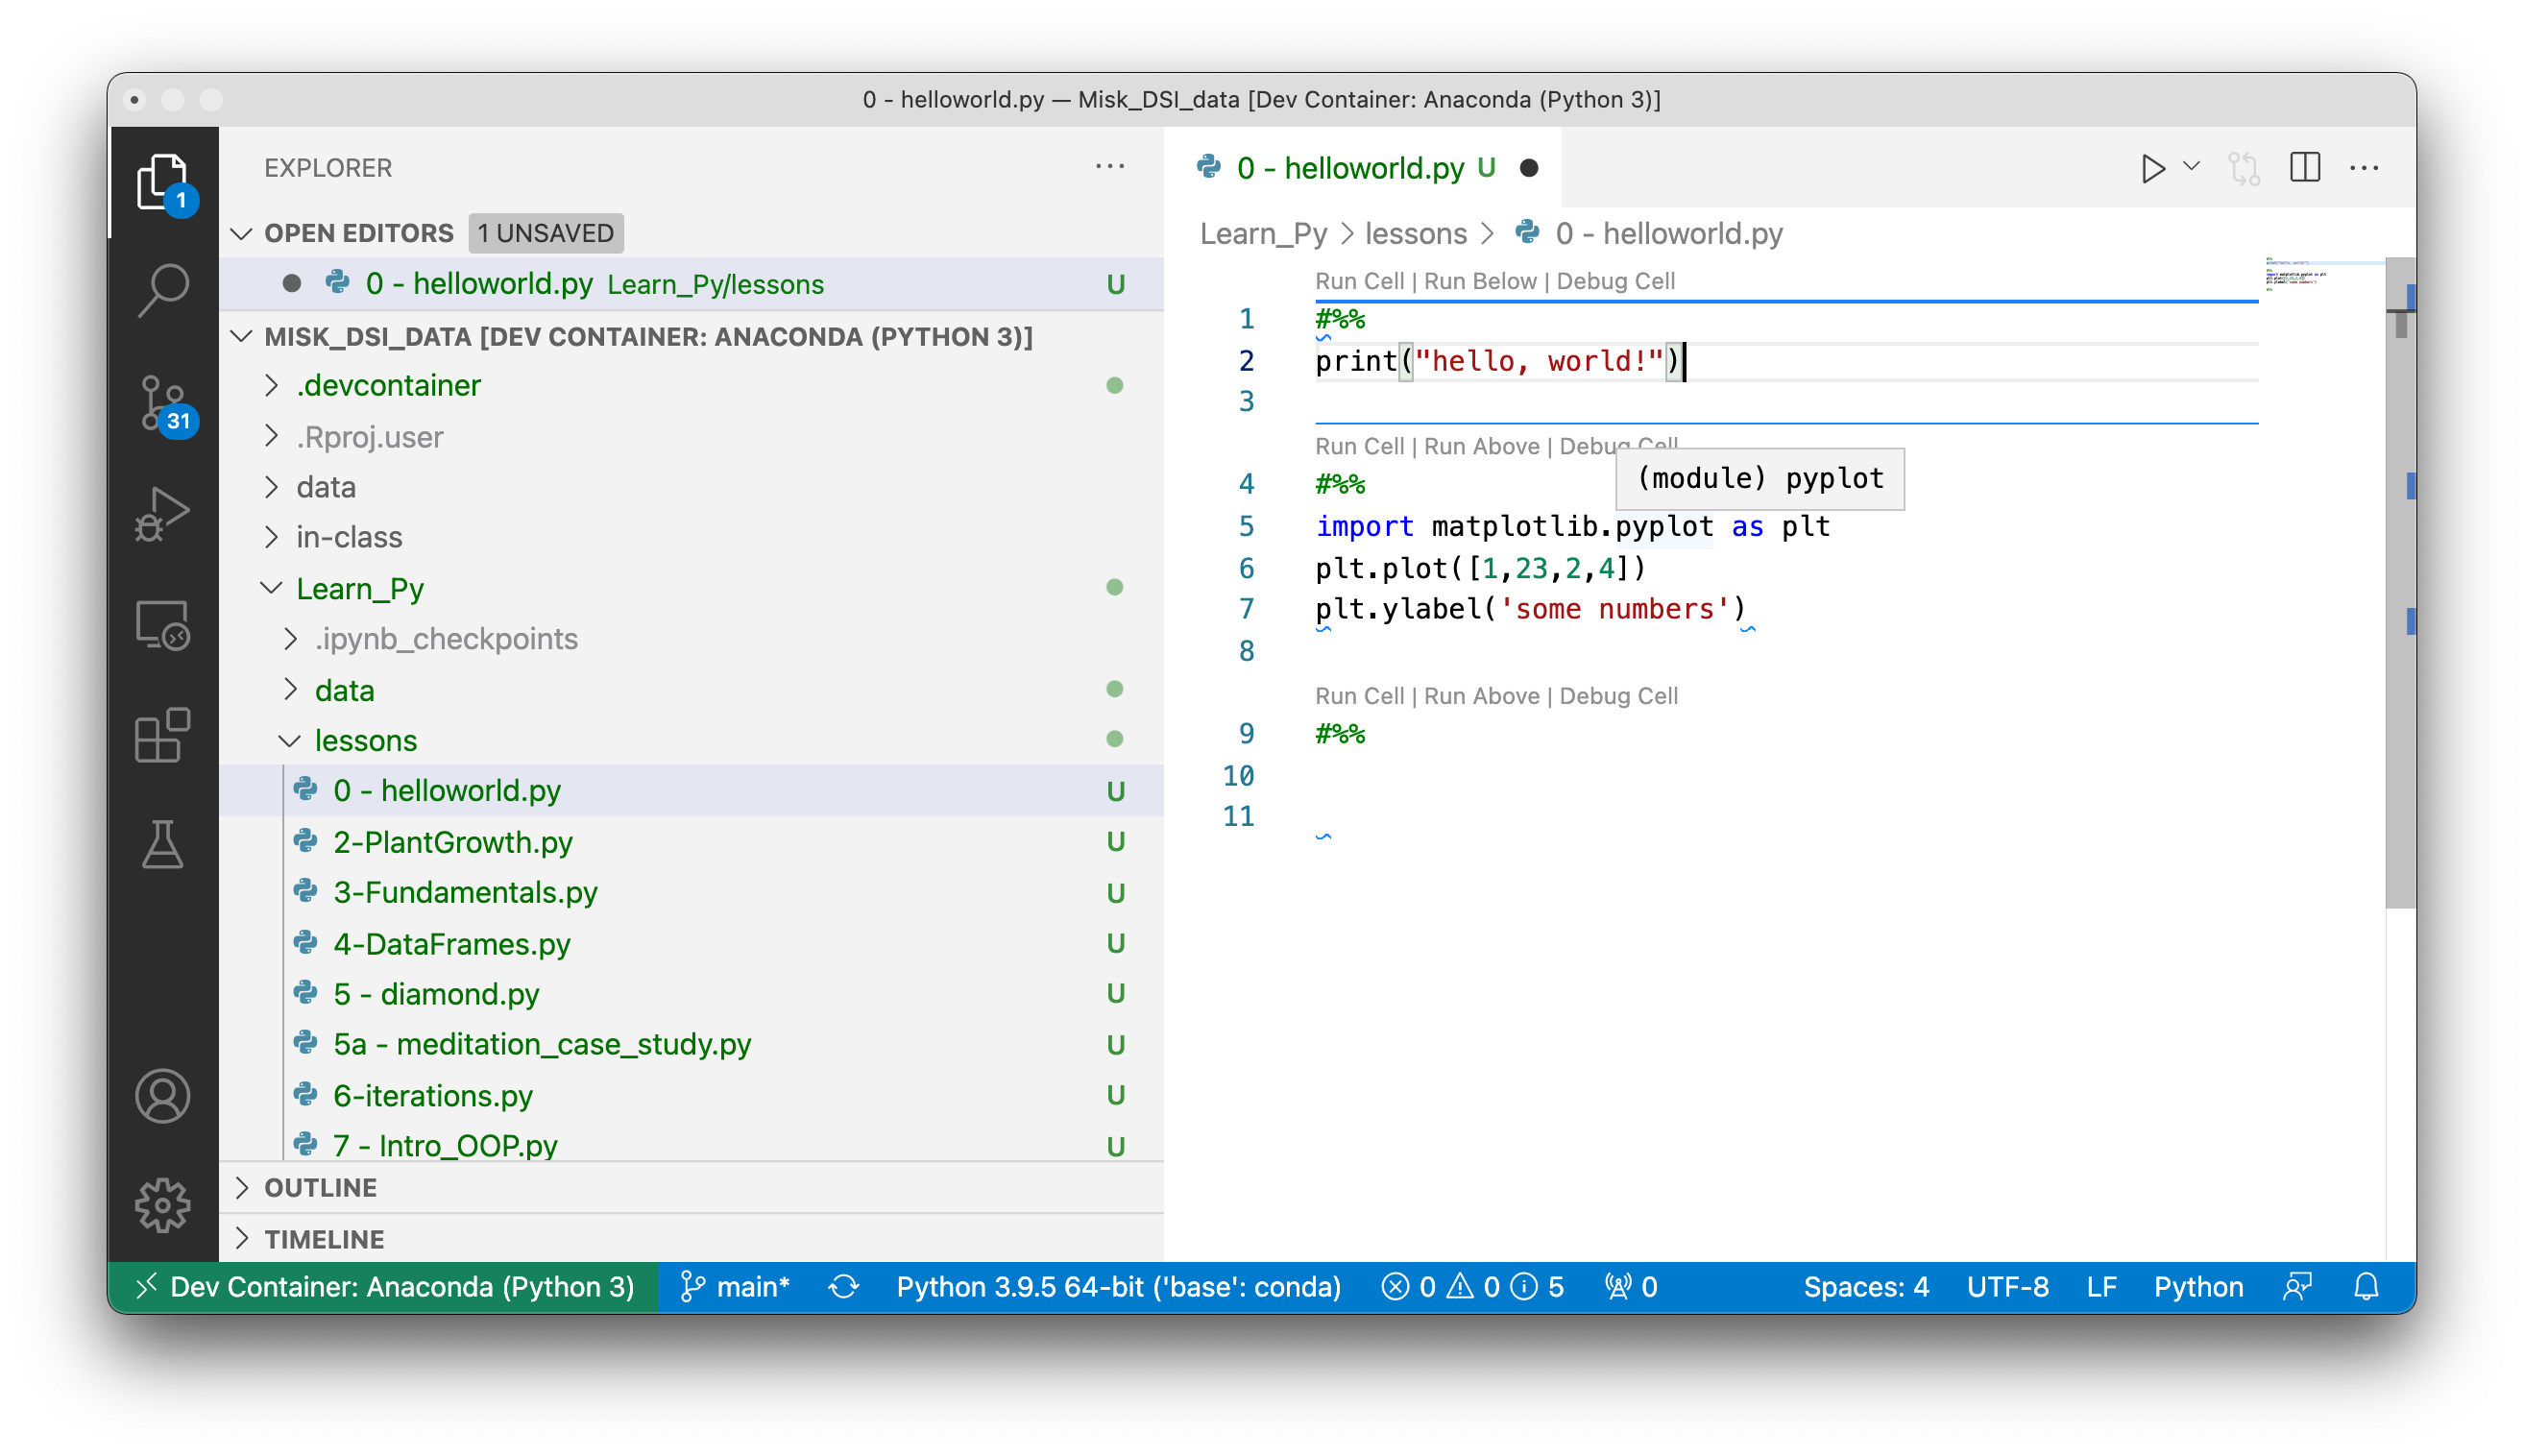
Figure 2.19: An open folder in VS Code.
Congratulations! You’re up and running with a fresh new anaconda 3 image and you can proceed. If you don’t see this output, please review all the above steps and ensure that you have completed each correctly.